
泰式芥末鸡.........
THAI MUSTARD CHICKEN
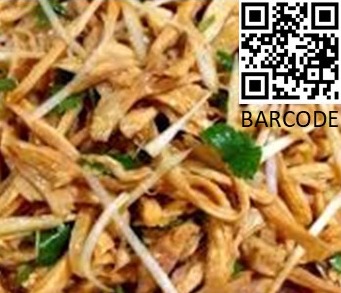
泰式芥末鸡融合了泰式酸和芥末辣,风味层次丰富。
芥末鸡配方 https://is.gd/mscrke
鸡丝300g
芥末酱1大勺,或根据个人风味调整
豆浆半杯
料酒1大勺
柠檬汁1大勺
柠檬皮增加清新风味
小米辣1根切细
糖1小勺
李锦记蚝油1大勺
蒜末3瓣
洋葱1个切丝
九层塔菜少量装饰
植物油适量
芥末鸡做法
鸡丝用1大勺料酒、1小勺蚝油、1小勺芥末酱、少许蒜末抓匀,放置30分钟。
碗里倒入豆浆、柠檬汁、糖、剩余芥末酱和蚝油,搅酱汁均匀备用。
热锅倒入植物油,爆蒜末、洋葱丝、小米辣、柠檬皮。
加入鸡翻炒。
倒入调好酱汁,转小火烧至鸡熟透,且酱汁浓稠。撒上九层塔菜享用。
如果不喜欢生吃九层塔菜,可稍微翻炒一下后享用。
(感谢DeepSeek介绍泰式芥末鸡,若有侵权请告知。)
THE STUNNING ALCOHOL FREE COCKTAILS.........
This article is introducing 9 Alcohol Free Cocktails.
ALCOHOL FREE PORN STAR MARTINI COCKTAIL
ALCOHOL FREE SPICY MARGARITA COCKTAIL
ALCOHOL FREE PINEAPPLE MINT TEA
ALCOHOL FREE COFFEE MARTINI COCKTAIL
ALCOHOL FREE MARTINI ALCOHOL RECIPE
ALCOHOL FREE STRAWBERRY CRUSH COCKTAIL
ALCOHOL FREE FRENCH ALCOHOL RECIPE
ALCOHOL FREE MOJITO COCKTAIL
ALCOHOL FREE GIMLET COCKTAIL
Let us read the following recipes.
ALCOHOL FREE PORN STAR MARTINI COCKTAIL RECIPE
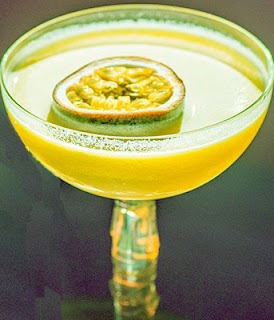

Ingredients - 50ml alcoholic-free gin, 9ml vanilla syrup, 1 fresh passion fruit seeds, 9ml passion fruit syrup, 9ml fresh lime juice, alcoholic-free sparkling wine to serve
Add above ingredients apart from the wine and garnish to a cocktail shaker with lots of ice and shake enough. Strain into a chilled coupe glass. Garnish, serve and enjoy!
ALCOHOL FREE SPICY MARGARITA ALCOHOL RECIPE
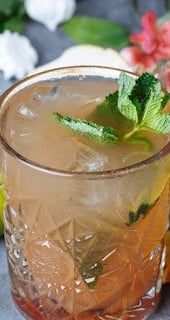

This alcoholic-free margarita is truly amazing - made with jalapeno cilantro simple syrup, lime juice, tonic water, and zero alcohol. A deliciously refreshing drink that will add some oomph to you.
Ingredients - Sugar, lime, Jalapeno’s, Tajin and tonic water
Dissolve some sugar in water and marinate the slices of jalapeno in the sugar water for making the Jalapeno simple syrup. Add ice, the jalapeno syrup, lime juice and tonic water to your glass and mix. Garnish with lime and jalapeno slices and stir.
ALCOHOL FREE PINEAPPLE MINT TEA RECIPE
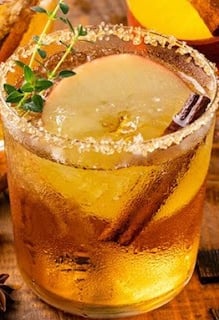

An easy-to-make cocktail recipe – with pineapple, fresh mint and tea – that's a perfect alcohol-free drink for a cozy meet up with friends.
Ingredients - 3 tablespoon caster sugar, fresh mint, plus extra to garnish, 1 tea bag, pineapple chunks, 1 lemon, juiced and an ice cubes
Put the sugar, mint and tea in a jug and add 500ml boiling water. Allow the tea bag to infuse for 5 minutes before removing. Cool fully. Drain the mint tea into a food processor, discard the mint and add the pineapple and lemon juice. Blend to smooth, then pass through a sieve into a jug. Add some ice cubes to the jug and swirl so it gets chilled. Fill tall glasses with ice cubes and mint leaves, top up with the pineapple mint tea and serve immediately.
ALCOHOL FREE COFFEE MARTINI COCKTAIL RECIPE
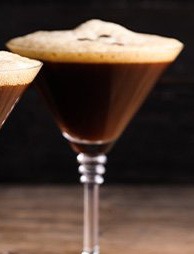

Ingredients - 50ml alcohol-free gin, 15ml alcohol-free coffee liqueur, 30ml coffee
Add your ingredients (apart from the garnish) to a shaker filled with ice. Shake well and then strain into a chilled martini glass. Allow the foam to rise and sit on top. Garnish and enjoy!
ALCOHOL FREE MARTINI ALCOHOL RECIPE
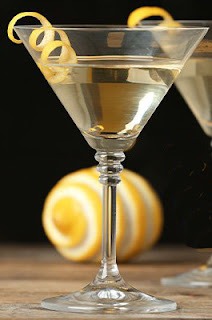

Ingredients - 60ml alcoholic-free gin, 15ml alcohol-free dry vermouth (available online), Lemon peel for garnish, ice cubes
Chill your alcohol-free gin and vermouth in the fridge. Add the gin and vermouth to a stirring glass (or shaker) with ice and stir gently. Strain into a chilled martini glass. Squeeze the lemon peel over the cocktail to release its oils, garnish and serve. Enjoy!
ALCOHOL FREE STRAWBERRY CRUSH COCKTAIL
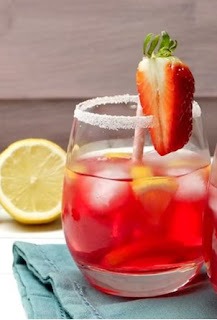

This simple yet elegant alcoholic-free cocktail is muddled with strawberries and mint, lime juice, simple syrup, and ginger beer. If you enjoy that sweet and tangy kick, then why not give them a go when your little bubba is fast asleep and listen to an inspiring podcast.
Ingredients - 150g strawberries, 2/3 tablespoon caster sugar, mint sprigs, ice cubes, and 500ml bottle low-alcohol beer
In a shaker, muddle the strawberries, mint, lime juice and simple syrup to a juicy pulp. Pour (unstrained) into a tall Collins glass. Fill with crushed ice and top with ginger beer. Garnish with an additional strawberry and mint sprig.
ALCOHOL FREE FRENCH ALCOHOL RECIPE
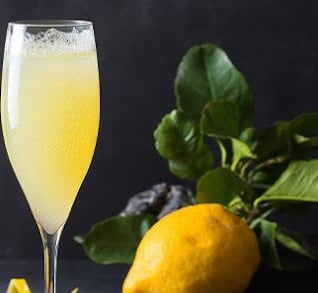

Ingredients - 30ml alcohol-free gin, 15ml lemon juice, 15ml simple syrup, alcohol-free sparkling wine, Lemon peel twist for garnish
Shake the gin, simple syrup and lemon juice with ice. Strain into a champagne flute. Top with the sparkling wine, garnish and enjoy!
ALCOHOL FREE MOJITO COCKTAIL


Ingredients - 50ml alcohol-free gin, 1 teaspoon sugar, Juice of 1 lime, Soda water, mint leaves, mint sprig for garnish
In a glass, muddle the mint leaves, sugar, gin and lime juice. Add ice and pour over the soda water. Garnish, serve and enjoy!
ALCOHOL FREE GIMLET COCKTAIL
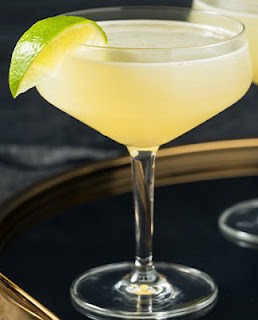

Ingredients - 75ml alcoholic-free gin, 15ml lime cordial, Lime slice for garnish
Add the gin and the cordial to a shaker with lots of ice. Shake enough and then pour into a chilled coupe glass. Serve with a slice of lime and enjoy!
(I appreciate MOTHER&BABY and CRAFT GIN CLUB for sharing the above recipes. Please let me know if it goes against the copyright.)
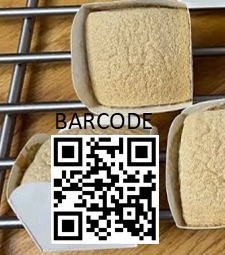

咖啡戚風小杯子蛋糕
INTRODUCING COFFEE CUP CAKE FOR YOUR DESSERT OR SNACK
咖啡戚風杯蛋糕用料
低筋面粉 90克
砂糖 60克
植物油 60克
罐装浓缩咖啡液 90克
柠檬汁 9滴
鸭蛋 6个
咖啡戚風杯蛋糕做法
加热植物油,此时可以看到盆底油如丝状。
低筋面粉放入盆里。
加热好的植物油倒入面粉里快速搅打,搅打到无干粉的细腻状态
倒入罐装浓缩咖啡液,搅均匀。
蛋清蛋黄分离,蛋清提前放入冰箱冷藏备用,可以使蛋清更容易打发,且稳定。
蛋黄放入到面糊里,搅均匀。蛋清里放入柠檬汁,可以去除蛋腥味,使蛋清更容易打发。
用打蛋器中速打发蛋清,当有大气泡时,第1次加入砂糖。
当气泡变得细腻,再次加入砂糖。
当蛋清打出明显纹路,最后一次放入砂糖。蛋清打发到提起打蛋器,有小尖角状态即可。
调打蛋器到最低档,轻微转几圈,可以打碎蛋清里的大气泡,使蛋糕更细腻。
取1/3蛋清放入蛋黄糊里,用翻拌方法搅均匀。
将搅均匀的蛋黄糊再倒回到剩余蛋清里,用同样的翻拌方式搅均匀。此时不能画圈搅,以防蛋清消泡。
用汤匙填面糊入蛋糕纸杯里。不可挤满,否则杯子蛋糕表面容易开裂。
保证杯子蛋糕不开裂,一定在初始阶段进行低温烘烤,然后根据时间段逐渐提升温度。
例如先用95 ℃烤35分钟;然后用120 ℃烤15分钟;最后用160 ℃烤9分钟。根据不同烤箱,适当调整温度。
这款配方做出的咖啡戚風小杯子蛋糕细腻,咖啡味浓郁,且不塌陷不开裂。
小贴士
蛋清在打发之前一定要放冰箱进行冷藏。冷藏后的蛋清更细腻,不容易消泡。
面糊在纸杯里不可太满,否则导致戚風纸杯蛋糕表面开裂。
初始温度为低温烘烤,随着时间的增加,温度逐渐提升。低温是纸杯蛋糕不开裂的关键。
(感谢下厨房介绍咖啡戚風小杯子蛋糕做法,若有侵权请告知。)
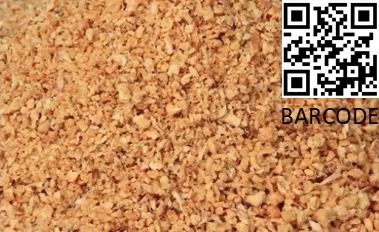

介绍大蒜油和油蒜酥
有些人觉得,油蒜酥是面里必须要有的调料之一,尤其是汤粉类。以下介绍大蒜油和油蒜酥做法。
蒜剥皮,不需要清洗,切或打碎蒜,蒜米不能太小,否则容易炒糊。
倒入大蒜碎块,然后在锅里加入植物油,没过蒜米即可,小火不断翻炒,一定要不断翻炒,不然容易炒糊。
用小火熬制炸酥以后,当蒜米看上去微金立即关火。捞出蒜,这是油蒜酥。
剩下蒜油装罐子里,以后用来炒菜特别好。
(感谢下厨房介绍大蒜油和油蒜酥做法,若有侵权请告知。)


介绍制作梅酒.........
INTRODUCING ON HOW TO MAKE STUNNING SOUR PLUM WINE
酸梅有营养保健价值, 富含维生素、苹果酸、柠檬酸、氨基酸、酒石酸和钾、钙、铁等矿质元素,以下介绍制梅酒配方。
酸梅酒配方
梅1磅,糖半磅,36度烧酒或伏特加600毫升。
制酸梅酒方法
洗净酸梅以后,放竹篓里晾干。
洗净大瓶后,用厨房纸巾擦干,放太阳下晒一晒消毒,否则酸梅酒容易长霉。
在大瓶里放入酸梅,倒入糖,按一层梅一层糖放。
沿着瓶内壁缓慢倒入烧酒,以浸没酸梅以上3厘米为度。
加上盖密封。
放置凉爽地方,3个月后即可享用。
小贴士
自制酸梅酒没有加防腐剂,如果瓶常开合,可能影响梅酒保存期。最佳做法是先以小瓶分装梅酒,到小瓶饮完才以干净的勺子补充,可延長梅酒保存期。
(感谢百度百科介绍酸梅酒,若有侵权请告知。)
INTRODUCING SCARY MONSTER CUPCAKE SNACK
Ingredients
1 pound icing mix, Food coloring, 6 pieces truffles, 6 candy eyes, 3 tablespoon sprinkles, 6 cupcakes
Instructions
Mix the icing mixture.
Then, transfer scoops into several different cups for each color of icing.
Squeeze a small amount of gel food coloring into each cup and messily stir.
Unwrap your truffles and generously dip one end into each color and place on top of your cupcakes.
Add candy eyes and colorful sprinkles on their heads.
Enjoy the monster cupcake.
(I appreciate Sugar & Cloth for introducing the monster cupcake recipe and providing its picture. Please let me know if it is against copyright.)


介绍炖鲤鱼
INTRODUCING THE STUNNING STEWED CARP
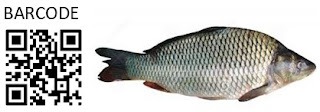

鲤鱼原产亚洲,又称鲤拐子,隶属在鲤科。鲤鱼含有丰富氨基酸和人体必需微量元素锌、镁、铁、钙、铜、磷等。它自古以来即为喜庆宴席所不可缺少的佳肴。以下介绍啤酒鲤鱼做法。
炖鲤鱼配方
鲤鱼
啤酒
辣椒
大料
姜
蒜
香菜
酱油
炖鲤鱼做法
鲤鱼去内脏,请小心别破了鱼胆,去鳃和麟后洗净切块
油热了加糖后小火炒融化
放鲤鱼
放辣椒
放姜
倒三瓶啤酒
放大料
放生抽酱油
放大蒜
鲤鱼炖熟以后放香菜
出锅后享用
(感谢下厨房介绍鲤鱼做法,若有侵权请告知。)
介绍海蜇里子.........
山东青岛崂山风景美,坐拥优良的天然码头,这里村民大多以渔业为生,码头和渔船自成一景独具风格,每到海蜇收获季节,渔民们在天微亮就驾船出海,前往渔区捕捞,风味海蜇是他们的目标。
海蜇无脑无骨,甚至没有心脏,它们属刺胞动物门,是无脊椎动物,里子是海蜇身上最金贵东西,大海蜇才有,它必须趁海蜇新鲜时快速撕下,时间长了,就撕不下来了。一只百斤海蜇最多只能出1斤海蜇里子,买60元,吃到嘴里如瘦肉里脊,却有着来自海洋的独特风味。被切成薄片的海蜇里子有肥牛质感,却更滑溜和鲜美。充满智慧的青岛人,对于海蜇里子有创意操作。
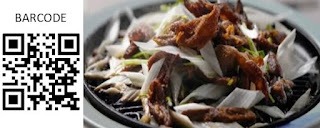

海蜇里子在专业厨师那里焕发出新光彩,例如这道特别的炙子烤海蜇里子。将炙子烧热,搭大葱和香菜末,海蜇里子用油微煎,烤香后再加进面饼里。海蜇里子的嫩和韧,海鲜自带的鲜和甜,香菜和葱脆,被酱料和香料一激发,顿生丰富和层次感。
(感谢青岛市文化和旅游局介绍海蜇里子,若有侵权请告知。)
海蜇里子炖拉瓜营养丰富,下面介绍这道菜做法
海蜇里子配方
海蜇里子
拉瓜
肉丝
味素
肉汤
生抽酱油
料酒
胡椒粉
姜片
葱末
韭菜
海蜇里子做法
把海蜇里子切片,拉瓜切条备用。
起锅烧热油,放入肉丝煸炒,再加入姜片、葱和料酒煸香。
加拉瓜,胡椒粉、生抽酱油和肉汤烧开后,盖上锅盖大火烧3分钟。
入海蜇里子,下锅里加热翻炒。
放入韭菜段略炒,加些味素炒匀即可出锅装盘。
(感谢诚得酒店厨师介绍海蜇里子炖拉瓜做法,若有侵权请告知。)
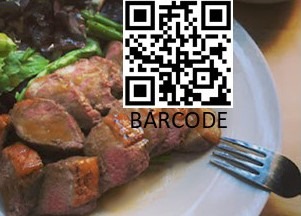

介绍芥末鸭………
芥末鸭用料
鸭1大块,糖1大勺,调味粉1大勺,烧酒1大勺,柠檬汁1大勺,芥末酱1大勺,叉烧酱1大勺
芥末鸭做法
抹一些调味粉在鸭肉上, 放置半小时。
用纸巾擦干鸭肉后,鸭皮向下放在锅里煎6MIN左右。
煎出鸭油使鸭皮变脆后,反转鸭肉煎3MIN左右, 如果有需要,可翻转再稍微煎一下。
鸭油留在锅里备用。鸭肉入碗或盘,放置6MIN后切片。
烧酒倒入留有鸭油锅里,烧开以后调小火,加入柠檬汁、糖、叉烧酱和芥末酱,搅匀烧稠即好了
鸭片淋上酱汁,搭配一些蔬菜即可享用。
(感谢JourneyWithHana介绍芥末鸭做法和提供照片,若有侵权请告知。)


INTRODUCING QUICK SAVORY ROAST CHICKEN
介绍快速做美味烤鸡
Ingredients
3 pounds chicken
1½ tablespoons seasoning
3 tablespoons cooking wine
6 cloves of garlic
A few tablespoons canola oil
A few lemon pieces
Preparation
Put the chicken in a large bowl, pour cooking wine to the chicken. Put it in the fridge for about half an hour, then season the bird. Ensures that the seasoning is distributed throughout the meat. This method results in meat with seasoning in it rather than on it. Add 6 cloves of garlic and a few lemon pieces inside the chicken. Put the seasoned chicken in the fridge for at least 3 hours before cooking. About half an hour before roasting the chicken, turn the oven to 460°F and let it heat up. You want it plenty hot in there. Meanwhile, take the chicken from the fridge and dry it with paper towels. Set aside.
Cooking
Oil a large heavy-bottomed skillet; cast iron is one of the good choices. You want a thick coating of oil that is more than a slick, less than a puddle. Place the pan over a high heat on the stovetop. After heating the oil, gently—really gently, so the oil doesn’t splatter and burn you—put the chicken in the pan skin side down and cook. After about 3 minutes its skin will turn faintly blond. Transfer the skillet to the floor of the oven. Depending on the size of the bird, the total cooking time in the oven will range from 19 minutes to half an hour. The chicken is done when the temperature in the thickest part registers 160°F on a thermometer. When the chicken is done, cut it into pieces, put them on a platter, and serve as is, or with a squeeze of lemon.
(I appreciate Epicurious for introducing roast chicken and providing the picture. Please let me know if it is against copyright.)
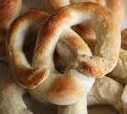

INTRODUCING THE RECIPE OF PRETZEL.........
bethbryan.com/wp-content/uploads/2013/02/IMG_3934.jpg
Ingredients
Five cups water
One third cup baking soda
Three and half teaspoons yeast
One tablespoon regular sugar
Three tablespoons granulated sugar
Three and half cups bread flour, plus half cup more for the surface while rolling out
Half tablespoon salt
One teaspoon wine
Nine tablespoons oil
Instructions
Pretzel dough
Pour one and half cups of water into the bowl of a stand mixer or large bowl and sprinkle the yeast on top of the water. Let them sit for six minutes.
Add one tablespoon regular sugar, three tablespoons granulated sugar, three tablespoons oil and one teaspoon wine. Stir, let them dissolve.
Add three cups of bread flour and half tablespoon of salt, mix them with a paddle attachment or a bread hook, or mix them with a spatula or large spoon.
Add the additional half cup of flour, knead them for six minutes. The dough will be slightly sticky. The dough is much easier to roll out if it is a little sticky. Place the dough in a lightly oiled bowl and cover with plastic wrap. Or just use the same bowl and lightly spray the sides of the bowl with cooking spray. Let the dough rise, then punch down the dough. Cover and let rise again.
Shape the dough
Place the rack in the middle of the oven and preheat the oven to 450 degrees. Preheat the oven.
Place the dough onto a lightly floured surface. Divide the dough into 9 pieces. Roll each piece into a 60 CM rope.
Form the rope into an upside down U.
Cross the U shape. Then form a pretzel shape.
Gently stretch the pretzel to give the dough room to rise while baking and hold its shape. Set aside on a lightly oiled or parchment lined cookie sheet.
Prepare soda solution for dipping pretzels
Pour three and half cups of water into a shallow pan. Pour one third cup of baking soda into the pan and stir with a spoon or whisk to dissolve.
Dip each pretzel in the soda solution, allowing extra soda solution to drip back into the pan. Place the pretzel back on the baking sheet.
Bake and serve pretzels
Bake at 450 degrees for about 12 minutes. Or on convection bake 425 for about 9 minutes. The pretzels will turn to golden. Highly recommend using convection if available.
Brush oil on hot pretzels.
(I appreciate Ms. Si Foster for sharing the Pretzels Recipe. Please let me know if it is against the copyright.)
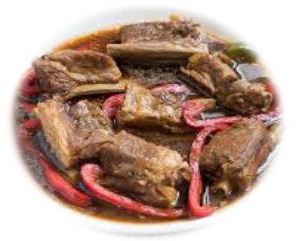

PRESSURE COOKER BABY BACK RIBS RECIPE
Easy baby back ribs recipe that is ready in less than an hour using a pressure cooker! The pork is meltingly tender and falls off the bones. The sauce is tangy, slightly sweet with an Asian twist! For a delicious aroma, bell peppers are added at the end of cooking.
Equipment - Pressure Cooker
Ingredients
Cooking oil
6 cloves garlic
900 grams pork ribs cut into pieces
⅓ cup soy sauce
⅓ cup rice vinegar
1 tablespoon cooking wine
1 tablespoon sugar
1 pound water
1 teaspoons black peppercorn
1 red bell pepper sliced
Instructions
Heat oil in the pressure cooker pot. Pan-fry pork ribs. Return meat in the pot then add chopped garlic. Pan-fry garlic.
Add soy sauce and vinegar. Do not stir. Let it simmer. Add cooking wine, black pepper, sugar, and water.
Close the lid and position the valve to pressure cook. When pressure is reached, lower the heat to maintain pressure. Set the timer to 19 minutes. For an electric pressure cooker, please follow your user manual.
Release the pressure quickly. Use cold water release for a stove-top pressure cooker. If using an electric pressure cooker, please follow directions from the user manual.
Set heat to high and let it simmer so the sauce has reduced to preferred consistency. Taste. Adjust sugar if needed. Add bell peppers, a few minutes before it finishes cooking. Enjoy!
Notes
Adjust pressure cooking time if using larger cuts of pork ribs.
The instructions are for a stove-stop pressure cooker. Please refer to your user manual if you use an electric pressure cooker.
(I appreciate RivertenKitchen for sharing the Pressure Cooker Pork Ribs Recipe. Please let me know if it is against the copyright.)
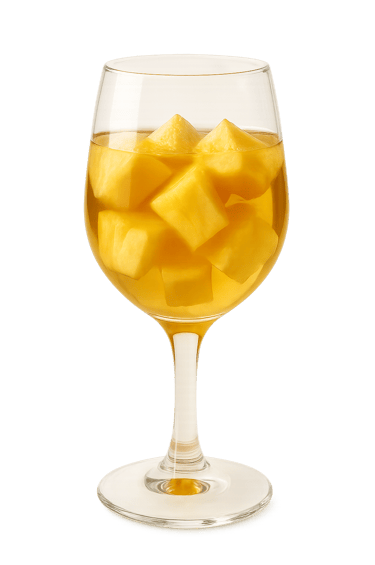

介绍凤梨酒
凤梨别名番梨,营养特别丰富,富含维生素、氨基酸、有机酸、粗纤维、钙、磷、铁等营养物质。下面介绍凤梨酒的制作方法。
挑选好的凤梨,
切凤梨,
酒瓶洗干净,晾干以后用酒再洗一下,
此凤梨特别甜,所以没有加糖,直接装凤梨块入酒瓶,别装满,
倒入伏特加酒没过凤梨块,9分满左右,盖紧瓶,
3个月以后可以品尝凤梨酒了。
(感谢搜狐介绍凤梨营养丰富,谢谢下厨房介绍凤梨酒制作方法,若有侵权请告知。)
(感谢ChatGPT提供上图)

介绍荞麦面包作早餐
INTRODUCING BUCKWHEAT BREAD FOR YOUR BREAKFAST
若要尝试一些小麦以外的健康面包作早餐,请试一试荞麦面包,这款面包没有小麦面粉,无麸质,不用醒面和揉面。荞麦营养丰富,其维生素和微量元素含量相对一般谷物多。还富含生物类黄酮、糖醇、多肤和纤维,具有降糖降胆固醇等功能。
荞麦面包用料
荞麦面粉 900克
盐 12克
植物油 160克
泡打粉 36克
瓜子仁或其他坚果碎/可选料
荞麦面包做法
放荞麦面粉、盐和泡打粉入一个容器,先搅匀,然后加清水7000毫升左右,倒入植物油,用木铲搅匀。这里水的量供参考,依据自己面粉状况增减。 不要过分搅,如果过度搅,在烤箱里面团发不好。
面团倒进烤盘轻轻刮平上面,不要用力压。
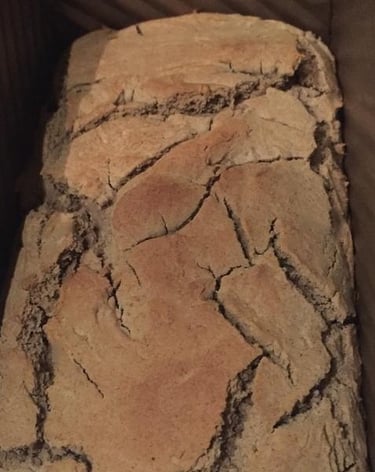
表面可选瓜子仁或其他坚果碎撒上。 放进预热好的烤箱中下层,190度烤1小时左右。这个时间供参考,根据自己烤箱控制时间。判断烤好没有,用一根竹签插进去,抽出来不带出面团就好了。烤好后取出烤箱迅速倒出,表面脆,内里软。烤制时顶部可能开裂,放凉后,裂口可以回缩很多。
(感谢下厨房介绍荞麦面包和提供上图,若有侵权请告知。)
三杯鸡.........
三杯鸡用料
童子鸡,糖,酒,蒜,油,酱油,味素
三杯鸡做法
鸡切块焯水沥干备用
半杯油倒入锅里,炒蒜片
倒入鸡块炒
倒入酒和酱油,糖放入,大火烧开。小火焖烧半小时左右
大火收汁调入味素提味即可
(感谢香哈介绍三杯鸡,若有侵权请告知。)

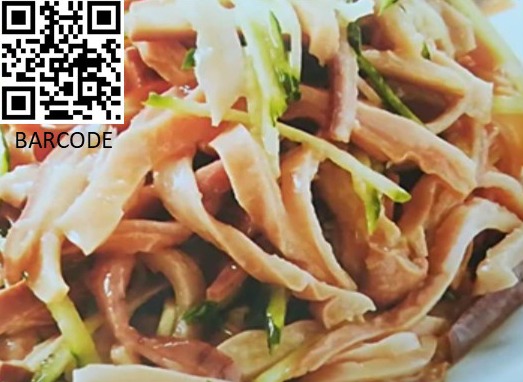

介绍泰芥末酸辣肉丝
(感谢百度百科提供以上示意图,若有侵权请告知。)
泰芥末酸辣肉丝用料
猪肉300克,糖1小勺,芥末酱1大勺,蒜末1小勺,料酒1大勺,植物油1大勺,青瓜丝适量,李锦记生抽酱油1大勺,泰式鱼酱1大勺,淀粉1小勺,辣椒适量,柠檬汁 1 大勺,可挑选少量九层塔菜用作装饰
泰芥末酸辣肉丝做法
猪肉切条状,加入少量料酒、酱油、淀粉和油搅一下,让肉更嫩滑。
调酱汁
在碗里放入泰式鱼酱、芥末酱、酱油、柠檬汁、糖、蒜末和辣椒,搅均匀备用。
炒猪肉
热锅里倒入少量油,下猪肉快炒后出锅备用。
拌炒和调味
锅里留少量底油,加入调好的酱汁加热至微沸,倒入已炒猪肉翻炒几下,让酱汁均匀包裹肉丝,加青瓜丝翻炒一下装盘。
如果喜好九层塔菜,出锅以后可撒上享用。
(感谢ChatGPT介绍泰式芥末酸辣肉丝,若有侵权请告知。)
介绍山东炒鸡………
山东草鸡富含氨基酸、钙、磷、铁、维生素、核黄素、尼克酸,营养功效丰富,非常适合热炒,下面介绍山东炒鸡做法。
山东炒鸡用料
草鸡 半只
桂皮 1块
大葱 半根
蒜 3瓣
大料 1个
干辣椒 6个
姜 9片
小米辣 9个
螺丝椒 3个
青椒 1个
豆瓣酱 1勺
生抽 1勺
料酒 1勺
烧酒 1勺
糖 适量
山东炒鸡做法
鸡切块,加入1勺料酒和5片姜片,搅拌匀,放置半小时。
期间准备葱段和蒜末,其余姜片切丝。
热锅里放油,下大料、桂皮和干辣椒,炒出香味,入姜蒜炒香。
放入鸡块翻炒几分钟,将鸡块拨至锅边。
下小米辣和一勺豆瓣酱,炒出香味后和鸡块一起翻炒。
期间加入一勺烧酒,若没有白酒用料酒,增香去除腥味。
沿锅边入一勺生抽翻炒调味,继续翻炒鸡块。
加一些糖炒匀,火关小一些,盖锅盖闷几分钟,期间滚刀切好青椒。
下葱段,下彩椒后翻炒,快干时即可起锅盛出。
(感谢漠寒新时代在下厨房分享山东炒鸡做法,若有侵权请告知。)
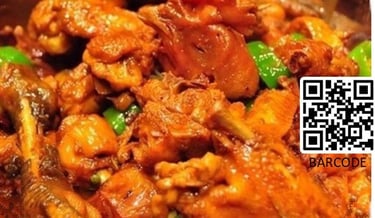

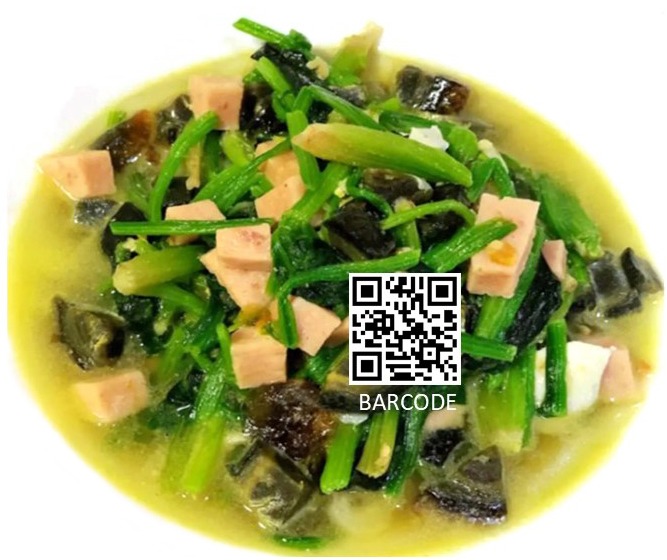

介绍上汤菠菜怎么做
山东是我国重要的蔬菜产区,菠菜是山东常见的蔬菜之一,以其营养丰富受到欢迎。菠菜富含多种维生素,对人体健康有很多益处,例如增强抵抗力、促进消化等。菠菜含有草酸,建议在烹饪前焯水,以减少涩味并提高钙质吸收率。以下介绍上汤菠菜做法。
用料
菠菜 1把
盒装午餐肉 少许
植物油 适量
蒜末 适量
皮蛋 1个
咸蛋 1个
开水 1碗
料酒 1小勺
调味粉 适量
做法
锅里加入少量植物油,炒蒜末。
加切好的咸蛋、皮蛋、午餐肉丁到锅里翻炒一下,加1小勺料酒和适量调味粉稍微翻炒一下,倒入1碗开水,加锅盖煮开。
煮汤底时另外烧水烫菠菜,水开后加几滴油,撒少许调味粉,加入菠菜烫几秒捞出。菠菜盛到盘中,淋上煮好的汤底,享用。
(感谢北美省钱快报介绍上汤菠菜做法和提供图片,若有侵权请告知。)
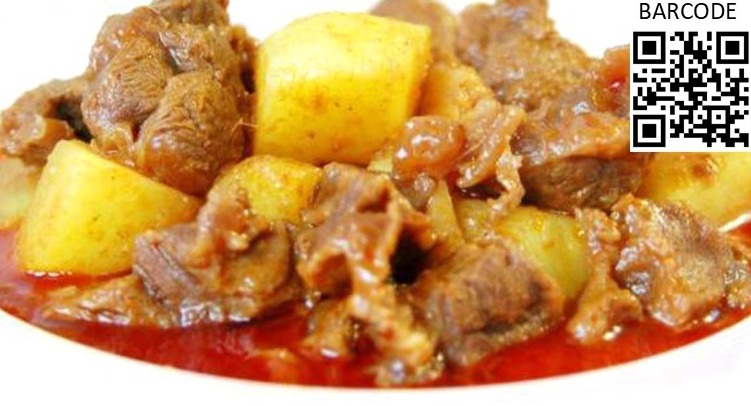

介绍咖喱牛腩
咖喱牛腩用料
红咖喱或李锦记咖喱酱1大勺;牛腩1斤;大马铃薯1个;蒜6瓣;料酒3勺;生抽3勺
咖喱牛腩做法
牛腩切小块,浸泡1小时以后捞起沥干。蒜去皮。马铃薯去皮切块。
锅里加少量植物油,烧热后入蒜瓣炒香,再倒入牛腩块,翻炒均匀以后加3勺料酒,3勺生抽,半小碗热水,拌匀后盖上压力盖。上汽后焖15分钟,关火。
1小时后打开压力盖,加入马铃薯块,1大勺咖喱。搅匀以后大火煮开,再小火慢炖半小时左右即可出锅享用。
(感谢擎天总馆介绍咖喱牛腩做法,若有侵权请告知。)
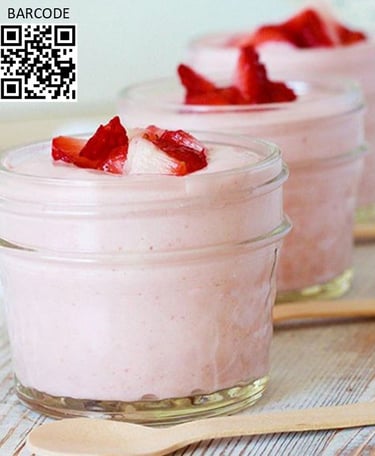

GLUTEN FREE SPRING STRAWBERRY MOUSSE DESSERT FOR YOUR HEALTH
Ingredients
1 cup sliced strawberries
1 and 1/2 cup cold whipping cream
1/3 cup granulated sugar
1 cup sliced peaches
Extra sliced strawberries for topping
Instructions
Add the strawberries, peaches and the sugar in a blender, then puree them.
In a cold bowl add the cream and whip it into stiff peaks form. Then fold in the puree gently.
Divide the strawberry peach mousse between the 3 cups. Refrigerate for approximately 1 hour. Top with the sliced strawberries. Enjoy!
(The above recipe is combined from online fruit mousse recipes. Please let me know if it is against the copyright.)
介绍芥末鳟鱼
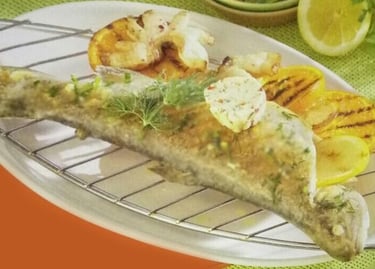

芥末鳟鱼用料
鳟鱼 1条
碎香菜1大勺
芥末酱 1大勺
蒜末1大勺
伍斯特酱油1大勺
蔬菜油 1大勺
柠檬汁 1小勺
柠檬 1个
芥末鳟鱼做法
放半大勺油,切碎的香菜、芥末酱、蒜末、半大勺伍斯特酱油、柠檬汁在碗里,搅均匀调料,密封好放冰箱冷藏。
在鳟鱼身上划刀,抹半大勺伍斯特酱和油。将鱼放在已烧热的烤架上烤半小时。烤时多翻转几次,翻一次刷一次调料。
把切片柠檬放烤架上烤一下,然后和剩下的调料一起上菜。
烤鳟鱼小贴士
烤柠檬片可能不是吹毛求疵的我们可以适应,可以用其它蔬菜代替。
(感谢喜乐小子在下厨房介绍芥末鳟鱼做法和提供上图,若有侵权请告知。)

素樱桃冰淇淋………
原料
无核冰樱桃一杯
无糖豆浆半杯
腰果酱一汤匙
糖浆一汤匙,可依口味调整
柠檬汁半茶匙
无冰淇淋机版本做法
冰樱桃、豆浆、腰果酱、糖浆和柠檬汁加入搅拌机,
搅打1分钟左右,使之浓稠顺滑。如果搅拌机转不动,可加少量豆浆,
立即享用冰沙状冰淇淋或放入冰箱定型,
享用软冰淇淋风格的,可以立即享受,
若要享用更扎实冰淇淋风格的,将搅合物倒入密封盒,放入冰箱半天,每小时搅一次防结冰块。待冰淇淋凝固后,即可取出享用。
有冰淇淋机版本做法
把冰樱桃、豆浆、腰果酱、糖浆和柠檬汁搅拌后冷藏 3小时,
倒入冰淇淋机,按说明搅拌冷冻,
可立即享用或再放入冰箱定型几小时。
小贴士
放入冰箱定型时,可以加入一些切小块的樱桃果,若加一些可可粉,可做巧克力樱桃风味;加坚果或黑巧克力在冰淇淋上,增加丰富层次;可以在冰淇淋表面装饰一些新鲜樱桃或巧克力。
(感谢ChatGPT介绍素樱桃冰淇淋,若有侵权请告知。)
(感谢摄图网提供上图,若有侵权请告知。)
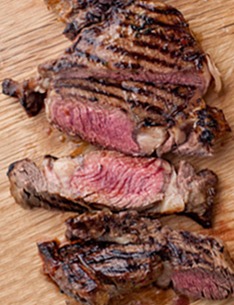

INTRODUCING MUSTARD RIBEYE STEAK RECIPE
介绍烤芥末肋眼牛排
Ingredients
1 pound of ribeye steaks
3 ounce of wine
3 ounce of oil
1 ounce of soy sauce
3 ounce of mustard
1 tablespoon cracked pepper
3 ounce of shallots, chopped
1 red chili, chopped
3 garlic cloves, crushed
1 ounce of tarragon
Method
Combine the wine, oil, mustard, soy sauce, pepper, shallots, garlic, chili and tarragon. Mix thoroughly before using it to cover the steaks completely. Place in the fridge and leave for 26 hours.
Turn the oven down to 390˚F / gas setting 6.
Place a pan over a high heat and add a tablespoon of vegetable oil.
Add the steaks and cook for a while, turn over and cook the other side.
For a rare steak, you do not need to cook the steak further in the oven. For a medium-rare steak, place in the preheated oven for about 1 minute. For a fully cooked steak, place in the preheated oven for about 5 minute. Remove the steaks from the oven and set aside to rest for a few minutes.
Enjoy!
(I appreciate Mr. Dominic Chapman for introducing the recipe of Mustard Ribeye Steak and providing the picture. Please let me know if it is against copyright.)


介绍大蒜芥末软面包
(感谢木村屋烘培房提供上图,若有侵权请告知。)
大蒜芥末软面包用料
面包粉350克,水150克,淡奶油30克,鸭蛋1个,植物油60克,干依士4克,盐2克,砂糖30克,大蒜30克,生抽酱油适量,葱适量,芥末酱1大勺
大蒜芥末软面包做法
50克面包粉和50克水,加入1克干依士,搅匀后冷藏发酵16个小时,让面团体积变大几倍。
放面包粉300克、水100克,淡奶油30克,鸭蛋1个,砂糖30克,依士3克,盐2克入面包机,加入上述发酵面团,搅至初步扩展状态。
加入30克植物油,先1档搅至油吸收,再转3档搅至完全扩展。发酵至3倍大。移至面板上,按压排气分成6份,松弛一刻钟。取一个面团,擀成牛舌状。
先把一头在三分之一处折上去。两侧折上去,然后再向上卷起来。
捏紧收口压在下面,不让面包团在发酵时散开,放入烤盘发酵。
发酵时开始做蒜蓉芥末酱。大蒜切成末,加入30克植物油,1大勺芥末酱,适量生抽酱油和葱,搅匀后待用。
面包团发酵好了,筛上一层薄粉,割出口。
把做好的芥末酱挤在里面。
烤箱提前预热,上面160℃,下面190℃,烤20分钟左右。烘烤的温度和时间根据自己的烤箱灵活调整。烤好的面包外酥里软,很美味。
(感谢禾小荷介绍大蒜芥末软面包做法,若有侵权请告知。)
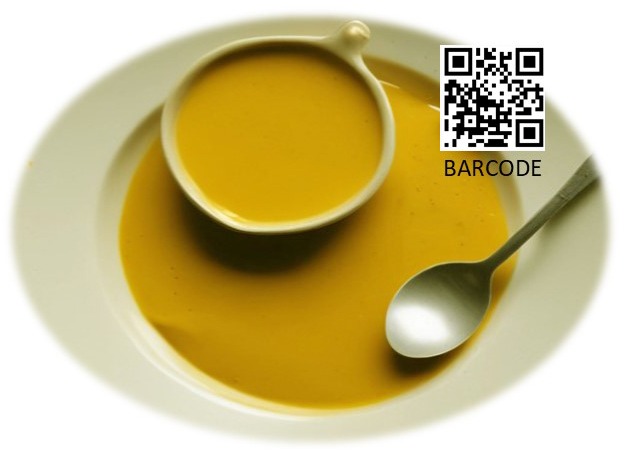

MUSTARD GRAVY RECIPE
(I appreciate Hostinger AI for generating the image.)
Ingredients
Six tablespoons vegetable or canola oil
Half cup regular flour
One quart broth
One large shallot, finely chopped
Quarter cup prepared mustard, preferably Colman’s
Half teaspoon Pepper
Salt
Half teaspoon ground turmeric
Half cup Villa Borghetti Pinot Grigio
Directions
Combine the oil and shallot in a saucepan over low heat. Cook, stirring occasionally for a few minutes.
Add the flour and cook, whisking often, about 3 minutes
Add the broth and grigio, a small splash at a time, thoroughly whisking after each addition to ensure there are no lumps. Once half the broth has been carefully incorporated, add the remaining broth and the turmeric and simmer, whisking occasionally, about 6 minutes.
Remove from heat. Taste and season with salt and pepper as needed. Whisk in mustard then taste, adding more salt as needed to ensure the mustard flavor comes through. Strain through a fine-mesh strainer and serve.
(I appreciate Ms. Sohla El-Waylly for providing the mustard gravy recipe. Please let me know if it is against the copyright.)
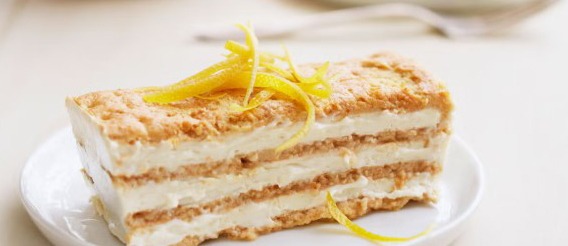

GUILT FREE LEMON MAPLE ICEBOX CAKE FOR YOUR DESSERT
柠檬枫糖冰糕
If you're looking for a deliciously simple dessert, look no further. This icebox cake combines graham crackers with a lemon-maple filling for a quick and easy treat. The best part is the filling is made with nonfat yogurt, so anyone can enjoy this dessert guilt-free.
Ingredients
Three Cups Nonfat Plain Yogurt
One Tablespoon Maple Syrup
Half Teaspoon Grated Lemon Peel
Half Teaspoon Vanilla Extract
Half Teaspoon No-Calorie Sweetener
Six Full Sheets of Low-fat Whole-Grain Graham Crackers
Directions
Line a loaf pan with plastic wrap, leaving over wrap on the two long sides.
In a bowl, stir together the yogurt, maple syrup, lemon peel, vanilla, and sweetener.
Line 3 graham cracker halves in the loaf pan. Spread one-third of the yogurt mixture over the crackers. Repeat twice. Top with the remaining 3 graham cracker halves.
Using the extra plastic on the two long sides, wrap the cake and refrigerate it for about 3 hours.
Unwrap the cake and using the overhanging plastic, pull the cake out of the pan. With a knife, gently cut the cake into 6 slices. Garnish with lemon peel and serve.
(I appreciate Country Living for providing the lemon maple icebox cake recipe and its picture. Please let me know if it is against the copyright.)
介绍泰式鸡柳.........
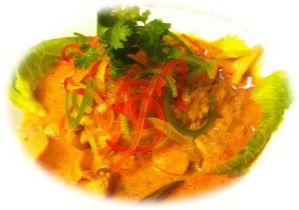

泰式鸡柳用料
鸡肉 90g, 红、黄、青甜椒 各一小瓣,红咖哩 3g, 椰子汁 9g, 香菜 一点, 辣椒 一小条, 柠檬叶约3片, 洋葱 20g, 蒜头 3粒, 生菜 3片, 酒 适量, 盐、胡椒 各一匙
泰式鸡柳做法
鸡肉切成条状,加入调料以后放置片刻。
甜椒去掉头尾弯曲部分,留下平整部分,先切薄片再切成细丝,然后泡在水里; 香菜可以一起泡; 辣椒去籽切丝后跟上面几样一起泡。
洋葱切碎,香菜切碎, 蒜头切碎。以上料备完了!
取平底锅煎鸡肉,煎至有香气即可,没有全熟没关系, 起锅装盘。
继续炒洋葱,加入柠檬片,炒香后再加蒜头和红咖哩,再把鸡肉一起放进来,之后加入鸡汤,稍为收汁后再起锅。
[装盘]铺上生菜,放上鸡柳条和酱汁,最后把泡在水里的甜椒、辣椒、香菜放在上面做装饰就完成了。
(感谢下厨房介绍泰式鸡柳做法,若有侵权请告知。)
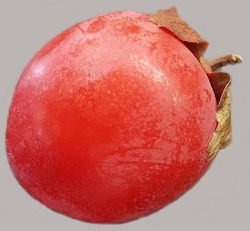
柿子干.........STUNNING DRIED PERSIMMON
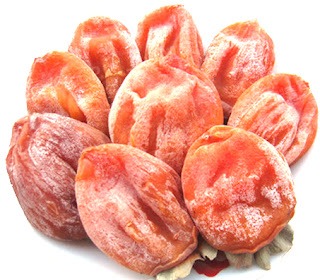

柿子是柿科落叶乔木。柿干含有独特丰富的膳食纤维,对于润泽肌肤和美容、预防便秘等都有良好的功效。柿子干能美容,营养功效多。
柿干里究竟含有什么美容成分?
柿干里含有新鲜柿子5倍的β-胡萝卜素,从专业角度来解读,β-胡萝卜素具有强力抗氧化作用,可去除身体内的活性氧,同时,还可以根据身体的需求转化为维生素A,可加强粘膜功能提高身体抗病力,有助在秋冬预防感冒。此外,β-胡萝卜素还对人们在秋冬的普遍烦恼——皮肤干燥有良好的改善效果。每天吃一个柿干能够温暖内脏,调整肠胃功能,缓解疲劳恢复体力。
柿干里膳食纤维含量很给力!
柿干由于在晒的过程中逐渐损失水分,因此膳食纤维的含量直线攀升,对于缓解、改善和预防便秘有重要作用,同时,膳食纤维还能吸收胆固醇,促进胆固醇排出。在年末年初的时节里,很多人几乎顿顿在外面就餐,大鱼大肉不鲜见,可蔬菜水果的进食量却直线降低,膳食纤维摄入量更是远远不能满足人体需求,因此便秘的发生更加频繁和普遍。对于这一部分苦恼于膳食纤维不足的人来说,每天吃一个柿干就能够满足对膳食纤维的需求,不妨从今天开始吃些柿干吧!
用来做柿子干的柿子需要有些硬。削去柿子表皮,留着柄,这样方便用来系绳子,把去皮柿子,用绳子串起来,把柿子系在枝条上,晒晾一星期左右, 偶尔需要捏一捏柿子,切记勿用力过猛。当表皮有一定厚度了,干且硬,捏起来里面软,就可以收进来保存了。一个星期之内吃不完需冷藏。
柿子干虽好不可多吃
尽管柿干对于润泽肌肤和美容、预防便秘等都有良好的功效,可由于柿干里含有丰富的单宁酸,过多摄入容易影响铁的吸收,同时膳食纤维的过多摄入反而可能加重便秘,因此,柿干虽好却不可以多吃。另外,柿干里含有的糖分不容小觑,过多吃柿干容易导致能量过剩和诱发肥胖,每天1个相对合适,请不要多吃。
(感谢美食天下介绍柿子干的丰富营养,谢谢小森林在下厨房分享柿子干做法,若有侵权请告知。)
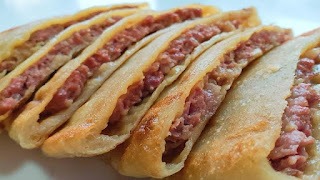

介绍荞面懒汉饼做法
懒汉饼,汉族人称它锅抡饼。 它用荞麦面做,简单易行便利应急。
懒汉饼,即懒惰人烙饼。一般适用在早餐简单地对付一下。
懒汉饼因人懒得做饭得名。妇女们又给它起了个名 - 披萨饼。
懒汉饼一开始没有馅,有人多年摸索以后,懒汉饼变革作懒汉馅饼,可做法基本差不多,不过还是离不开懒。只在里面多了馅,做工相对复杂了一些。事先要剁馅,所以,多了几道工序。
在一般情况下,一个懒汉饼可够几个人吃。
做懒汉饼用90%以上荞面,简单便利易行,熟得快!馅,根据你风格搭配。
做法
先把面和成糊状,如稀酱似的。然后直接倒入锅内,待熟六成之后,再将馅放到饼上,铺开压实之后再倒一层面,涂匀后翻个,烙熟就完成了!
(感谢新浪介绍荞面懒汉饼做法,若有侵权请告知。)
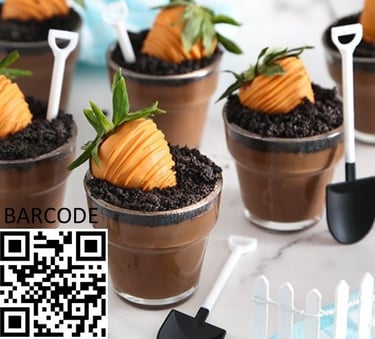

INTRODUCING CHOCOLATE PUDDING DIRT CUPS
Ingredients
Chocolate pudding ingredients
1/4 cup cornstarch, 1/2 cup granulated sugar, 1/3 cup unsweetened cocoa powder, 2 1/4 cups half and half, 1 tablespoons oil, 1 teaspoon vanilla extract, 1/4 teaspoon fine grain salt
Dirt topping ingredients
1 tablespoons oil, 1/2 cup chocolate cookie crumbs
Strawberry carrots ingredients
6 fresh strawberries with stems intact
6 ounce candy melting wafers
Instructions
Chocolate pudding instructions
Combine the cornstarch, cocoa, granulated sugar, and salt in a medium saucepan and whisk them. Place the pan over medium high heat and gradually add the half and half while whisking constantly.
Cook while whisking constantly. The mixture will begin to thicken. Bring the mixture to a bubble and cook for about half to one minute, whisking constantly.
Remove from the heat source and add the oil and vanilla extract. Mix them to combine.
Spoon pudding evenly into the 6 dessert cups.
Dirt topping instructions
Combine the crumbs and oil in a small bowl. Mix them to combine.
Top each pudding cup with spoonsful of the crumbs. Refrigerate them while you make the strawberry carrots.
Strawberry carrots instructions
Skewer each strawberry through the top. Place on a parchment-lined baking sheet.
Melt the candy in a microwave-safe bowl in the microwave at full power in half minute intervals. Stir well between heating times, the candy will be melted and smooth. About one and a half minutes.
Dip strawberries into the melted candy up to the greens. Allow the excess candy to drip back into the bowl. Transfer back to the parchment-lined baking sheet. Repeat with remaining strawberries. Allow the candy to set, about 15 minutes.
Place the leftover melted candy in a disposable piping bag and snip a tiny hole in the end. Drizzle melted candy over the strawberries in zigzag fashion to mimic the appearance of the carrot’s textured lines. Allow the candy to set, about 15 minutes.
Place a strawberry carrot on top of each pudding cup. Refrigerate it in the refrigerator for up to 60 hours. Serve with mini shovel dessert spoons for a fun presentation.
(I appreciate Sprinkle Bakes for introducing the Chocolate Pudding Dirt Cups recipe and providing its picture. Please let me know if it is against copyright.)
芥末南瓜用料
南瓜 600克
凯撒酱 90克
芥末酱 9克
芥末南瓜做法
南瓜带皮切大块放到烤盘里,表面刷上一层油。
放进烤箱230度上下火30分钟。
当烤南瓜时,我们来准备酱料,90克凯撒酱和9克芥末酱放在碗里搅匀。
南瓜烤好后取出来,表面放上芥末凯撒酱。
继续放回烤箱,190度烤9分钟,可以享用啦。
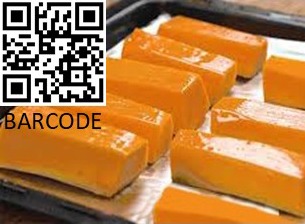
(感谢小羽私厨在下厨房介绍芥末酱烤南瓜和提供上图,若有侵权请告知。)
芥末酱烤南瓜

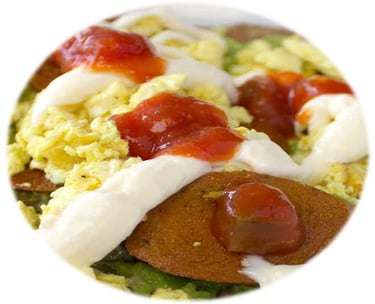
HOT DOG AVOCADO BREAKFAST RECIPE
COOK TIME - 9 minutes
Ingredients
1 pan bread
6 oz Organic Soft Tofu
1/16 teaspoon of turmeric
1/16 teaspoon of pepper
1/8 teaspoon garlic powder
1 hot dog, sliced
1 teaspoon oil
90 g ripe avocado
1 tablespoon mayonnaise
1 tablespoon salsa
Instructions
Over medium high heat on a non-stick pan, break up the soft tofu, turn off the heat after cooking the tofu, add the seasonings and mix them.
Push the scramble to the side, add the hot dog slices and turn the heat back on. Optionally add the oil.
Mash the avocado on to the pan bread and spread evenly. Season with garlic powder and pepper to taste. Add the hot dog scramble, top with a mayo mayonnaise and salsa.
(I appreciate Mary’s Test Kitchen for posting the above recipe. The above image is from shorturl.at/kKZ59. Please let me know if it goes against the copyright.)

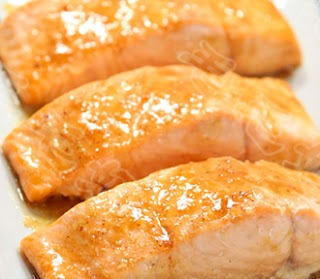
芥末枫糖浆烤三文鱼.........
THE MUSTARD SALMON FOR YOUR PICNIC
芥末枫糖浆烤三文鱼适合用作野餐
芥末枫糖三文鱼用料
三文鱼900克
素油3大匙
枫糖浆1/3杯
生抽酱油 3大匙
芥末酱3大匙。
芥末枫糖三文鱼做法
将三文鱼片冲洗后,切3厘米宽块,放入一烤盘里待用。
将素油、枫糖浆、生抽酱油和芥末酱放入一杯子里,用勺子搅拌均匀。
烤箱预热至430F。将拌匀酱汁倒在三文鱼块上,放入烤箱里烤9-15分钟。(根据个人生熟喜好掌握)
取出烤好三文鱼享用。
(感谢毛毛妈提供以上菜谱,若有侵权请告知。)

草莓戚风小杯子蛋糕.........INTRODUCING THE STUNNING STRAWBERRY CHIFFON CUPCAKES
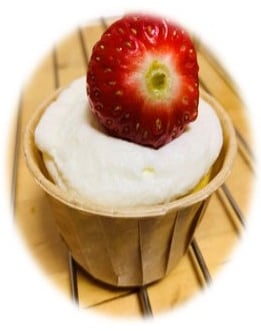

草莓小杯子蛋糕用料
戚风蛋糕纸杯 32个
大个蛋 6个
低筋面粉 130克
素油 65克
细砂糖 90克
水 95克
柠檬汁 几滴
草莓小杯子蛋糕做法
准备新鲜草莓,洗净沥干。
烤箱160度预热,蛋黄蛋清分离备用,蛋清放冰箱暂存。无水无油盆中加入素油和水,加热至60度,充分搅拌,这样蛋糕不容易消泡,油水加热,让杯子蛋糕不容易塌陷。
加入过筛的低筋面粉,搅拌均匀,然后加入蛋黄,充分搅拌均匀,蛋黄糊完成待用。
冰箱取出蛋清,加入柠檬汁,用打蛋器低速搅拌出泡,分三次加入细砂糖打至泡发,冰过的蛋清打发更加细腻。
泡发蛋清分三次加入到蛋黄糊里搅拌均匀。
做好的蛋糕糊放入到小纸杯里,六分满。
烤箱160度烘烤30分钟。具体时间根据各家烤箱调整。
400毫升淡奶油加32克砂糖,打发,然后装入挤花袋,挤到放凉的杯子蛋糕上。
加入小草莓装饰即可。
(感谢愿的美食在下厨房分享,若有侵权请告知)
介绍油辣鸡.........
油辣鸡用料
鸡
糖
红辣椒
蒜
豉油
生抽酱油
油辣鸡做法
鸡洗净切小块。蒜剁碎。红辣椒剪段。
锅入油大火烧热入蒜爆香,入鸡肉、少许生抽酱油,转中火略炒,转小火入红辣椒继续炒至鸡皮变脆。
入适量豉油、糖炒匀关火。
(感谢下厨房分享,若有侵权请告知)
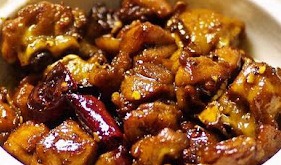

巧克力松饼粉纸杯糕
THE CHOCOLATE MUFFIN CUP CAKE FOR DESSERT OR SNACK………
用料
松饼粉 300g
蛋 3个
枫糖浆 9大勺,根据自己风味调整
油 150ml
巧克力粉 30克
做法
准备好材料。将蛋打散和油搅匀,加入松饼粉,巧克力粉和枫糖浆,搅均匀。
模具内放纸杯,将上一步里的浆料倒入纸杯,别倒满。预热烤箱,190℃烤30分钟左右。出炉,享用。
(感谢下厨房介绍巧克力松饼粉纸杯糕做法,图源自shorturl.at/udGsC,若有侵权请告知。)
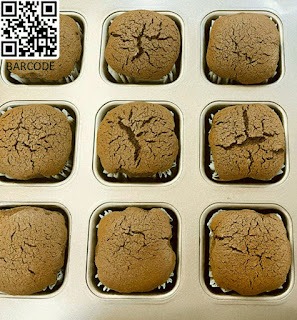

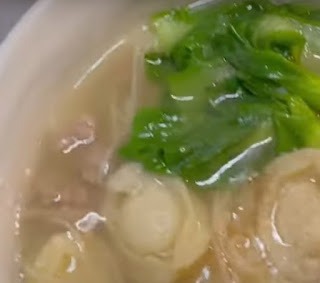

介绍做鲍鱼过桥米线.........
材料
鲍鱼 – 9个 (加料酒、调味粉、胡椒粉、姜、蒜和芡粉搅拌均匀)
米线 – 1捆 (焯烫后捞出自然晾凉)
油菜 – 3颗洗净备用
豆腐皮 – 几片
肉片 – 9片 (加料酒、调味粉、姜、蒜和芡粉搅拌均匀)
肉汤 - 3杯
大蒜 - 1 瓣 (切碎)
姜 – 半小头 (切碎)
料酒 – 1大勺
芡粉 - 1大勺
素油 - 1大勺
胡椒粉 – 1小勺
调味粉
辣油 (可选用)
做法
油烧热,爆炒蒜和姜,入里脊,炒一下
入鲍鱼,炒一下
倒入肉汤烧开,加入米线烧开
加入豆腐皮和油菜烧一会儿,时间自己掌握
加入胡椒粉和调味粉
(若喜好辣味,加辣油)
关火后盛入碗里享用
(以上做法源自网络,若有侵权请告知。)
(示意图源自美味天堂,若有侵权请告知)
酱油虾.........
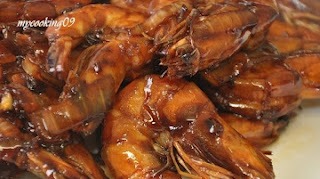

虾俗称虾子,长身亚门节肢动物。虾子营养丰富,它富含蛋白质、谷氨酸、钙、磷、铁、硒和镁等矿物质和维生素。虾皮里含有丰富钙。以下介绍酱油虾做法,酱油和糖分量,可以自行调整。
酱油虾用料
虾 - 1斤
蒜 - 半个
姜 – 半头
生抽酱油 - 1勺
老抽酱油 - 1勺
糖 - 适量
油
耗油 - 半勺
胡椒粉 - 适量
料酒 - 1勺
淀粉 - 1勺
酱油虾做法
虾里倒入料酒搅拌一下。
虾捞起,锅里放入油,油热了,放进蒜片和姜片小炒,把虾放进锅里炸炒。
淀粉加水搅拌一下,再放入胡椒粉,糖,生抽及老抽酱油和耗油,搅拌均匀倒入锅里,略炒至虾子均匀裹上酱油。
馋嘴巴们可以享用了。
(感谢下厨房介绍酱油虾,若有侵权请告知)
介绍韭菜石居
石居鱼又称八爪鱼,有很多长腿,被人们用来形容劈腿男,它每条腿上约有 300多个吸盘,每个吸盘拉力超过百克,无论谁被它的长腿缠牢,都难以脱身。
石居哥力气大、聪明残酷好斗,海洋里一霸,能快速移动迅猛进攻,不少海洋动物都怕它。它的神经系统在无脊推动物里最复杂,它的大脑有5亿个神经元,这使其具有超过一般动物的思维能力。通过基因解码,科研人员发现石居鱼拥有一套和人类相似的基因,这解释了为什么石居鱼具有学习能力。它和人类一样有不小的大脑,还有一双具备虹膜、视网膜和水晶体的眼睛。多年从事石居鱼研究的专家指出,章鱼具有概念思维,能够独自解决复杂问题,正是此能力使其具有用两足行走的本领。石居鱼拥有长短期记忆力,通过观察和练习掌握新技能,甚至拥有不同情绪。
石居鱼有惊人应变能力,它可以随时把自己皮肤伪装得和周围协调一致。蛸有脱身技能。由于它能将水存在套膜腔里,依靠溶解在水里的氧气生活,因此它离开了海水照样能活上几天。
石居和鱿鱼一样没有壳,它的力气来自腿肌肉,蛸鱼能喷墨。鱿鱼没有墨,体细长,里面有一条透明软骨。
(感谢搜狐介绍蛸,若有侵权请告知。)
下面介绍怎么烹饪石居
韭菜石居鱼
石居和韭菜爆炒几下,既可以做出爽脆菜了。
韭菜石居用料
石居鱼适量,韭菜适量,葱1颗,蒜3瓣,调味料少许,植物油少许。
韭菜石居做法
石居烧熟后捞出,放凉水降温后切段;
韭菜切段待用,葱切丝、蒜切片待用;
炒锅放油烧热,加入葱蒜爆香,然后倒入石居炒;
再放入韭菜,煸炒后加调味料即可出锅。
葡萄酒小石居
葡萄酒石居鱼清淡,时有时无若有若无的酒香不时在飘散。
葡萄酒石居用料
幼小石居适量,甜面酱适量,植物油少许,蒜切片,生抽酱油适量,葡萄酒一大勺,甜椒一个切丝。
葡萄酒石居做法
炒锅放植物油爆香蒜片后加入小石居翻炒1分钟,然后淋入甜面酱;
再加入生抽酱油和葡萄酒翻炒几分钟,接着放入甜椒丝翻炒5分钟;
调味后,翻炒均匀即可出锅。
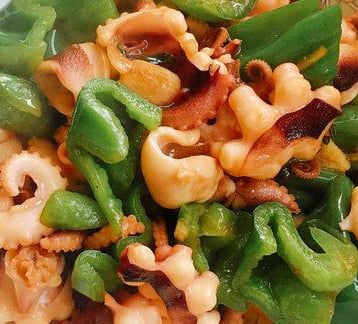
(感谢口碑美食介绍怎么烹饪石居,谢谢下厨房提供图片,若有侵权请告知。)


SPRING SEASONAL AVOCADO PEACH RECIPE
By Greg Baker The Refinery Tampa
Photography by Zach DeSart
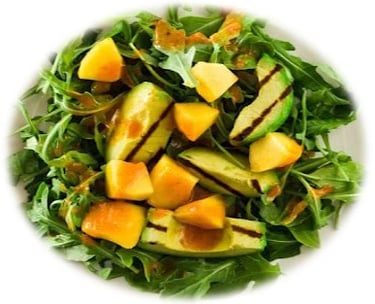

This salad is made with minimal effort. It could be served as a side dish during breakfast or lunch.
Ingredients
1/2 red sweet pepper, cored and seeded
3 tablespoons red wine vinegar
1/2 vanilla bean, seeds scraped
1/2 teaspoon sugar
1/3 cup olive oil
3 almost-ripe avocados
9 cups sorrel
3 peaches, diced and peeled
Preparation
Roast bell pepper. Peel and chop pepper; puree with red wine vinegar, vanilla, and sugar in a blender.
With the machine running, gradually add olive oil. Season with salt and pepper.
Halve avocados, season with salt and pepper. Drizzle with olive oil and place cut side down on a medium-hot grill for about 5 minutes. Peel and thickly slice.
Toss with sorrel and peaches. Drizzle dressing over.
(I appreciate Bon Appetit for sharing the above recipe. Please let me know if it is against the copyright.)
介绍山东烧鸡………
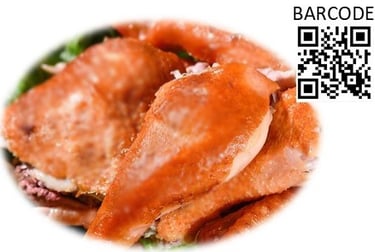

山东烧鸡营养很丰富,有益智补虚和健脾壮筋骨作用,下面介绍这一道山东地方名菜做法。
山东烧鸡用料
草鸡1只
桂皮1片
大料1粒
葱3根
料酒半大匙
生抽酱油适量
麻油半小匙
辣椒油适量
醋3大匙
蒜末1大匙
糖适量
制作山东烧鸡
鸡洗净抹干,刺破鸡眼睛,别在炸时弹起。用料酒和生抽酱油搽匀鸡身和鸡皮,放置半小时。
放入滚油里炸,捞起后,放入大料和桂皮以及葱,蒸1个半小时。
鸡冷后撕成粗条,鸡骨剁开盛碟上,鸡肉放骨上,拌匀糖、醋、蒜末、麻油和辣椒油,调和成淋料洒在鸡上即可。
(感谢百度百科介绍山东烧鸡,若有侵权请告知。)
韭菜马铃薯泥鸡肉派………
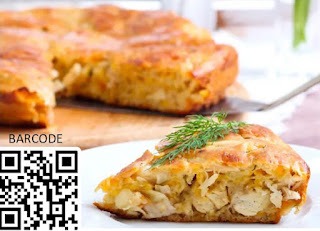

韭菜马铃薯鸡派用料
鸡肉
碎芝士
冷藏布里干酪面团
韭菜
胡椒粉
马铃薯泥
特级初榨橄榄油
调味粉
半杯葡萄酒
韭菜马铃薯鸡派做法
烤箱预热到360F。
鸡肉切小块,韭葱切碎,放在锅里加少许橄榄油炒熟。加入鸡肉、调味粉和胡椒粉。 将其炒熟,然后加入葡萄酒,烧3 MIN。
在锅里,将马铃薯烧至变软。
准备一个烤盘,放入冷藏的布里干酪面团,将马铃薯泥放在底部。 上面放一层韭菜和鸡肉。
再盖上马铃薯泥,在上面撒上一些碎芝士。 用面团盖住它。
烘烤约30分钟后享用。
(感谢安吉拉介绍韭菜马铃薯泥鸡肉派,若有侵权请告知。)
介绍芥末烤鸡三文治
MUSTARD GARLIC ROASTED CHICKEN SANDWICH FOR BREAKFAST OR LUNCH
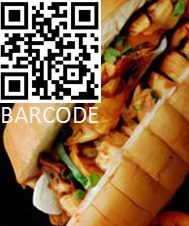

这款三明治很有风味,富含蛋白质和维生素营养价值,提供了早餐或午餐的更健康选择。
芥末烤鸡三文治用料
300克烤鸡,3片番茄,6片面包,适量大蒜末 ,90克凯撒酱,90克甜芥末酱,30克甜椒丁,适量脆生菜,30克洋葱丁
芥末烤鸡三文治做法
在3片面包上分别放脆生菜、番茄片、洋葱丁、大蒜末、甜椒丁、烤鸡,淋上芥末酱和凯撒酱,再盖上面包,快来享用这美味早餐或午餐!
(感谢SnapCalorie介绍芥末烤鸡三文治和提供上图,若有侵权请告知。)
介绍做草莓杯子蛋糕………
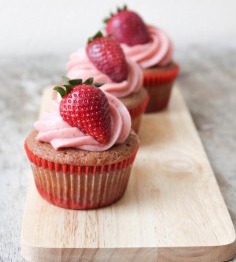

pic.baike.soso.com/ugc/baikepic2/3580/20220506145823-556666408_jpeg_807_1024_72184.jpg/300
草莓杯子蛋糕用料
蛋3个
细砂糖90克
低筋面粉90克
油15克
草莓植脂末适量
草莓适量
牛奶15克
草莓杯子蛋糕制作法
低筋面粉过筛备用。
蛋打散以后,加入细砂糖打至用打蛋头挑起蛋液划线,划痕不会立即消失的程度。
加入过筛的低筋面粉拌匀。
取少量面糊加油和牛奶搅匀。
加入其余面糊搅匀。
面糊入纸杯,约8分左右满。
放入预热180℃的烤箱,上下火,15分钟左右。
蛋糕晾凉后,在表面挤适量草莓植脂末后,用草莓进行装饰。
(感谢搜狗百科介绍草莓杯子蛋糕制作法,若有侵权请告知。)
介绍一杯山楂枸杞茶。。。。。。。。。
山楂是一类特酸果子,可加工制作干山楂、山楂片却很独特。山楂枸杞茶是用山楂和枸杞一起冲泡的一类滋补茶,具有特别养生功效,那么山楂枸杞茶咋样制作才最佳呢?
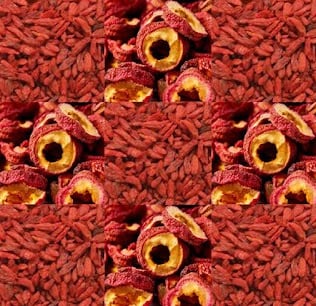

制山楂枸杞茶
主料 - 山楂干5-9片、枸杞9粒
配料 - 糖随意(可不放)
将山楂(用鲜山楂或干山楂片均可)和枸杞(9粒左右)均洗净后置于茶杯里
冲入沸水浸泡30分钟左右即可用
制得山楂枸杞茶上下午分饮
山楂枸杞茶有啥功效
可以帮助开胃消食化积、同时还能增强体质、提高抗病能力,有抗衰老、降压、降脂和降胆固醇功效。其次,因为有枸杞,让这杯山楂枸杞茶可以起到明目养肝和滋补肾脏功效,适用于眩晕症、胃病和神经衰弱等病症,因此山楂枸杞茶受到很多人青睐。
山楂枸杞茶还能够益肾补肝和益智明目,对治疗心血管疾病有良好的辅助治疗作用。山楂可以消食健胃,不仅有美容效果,还有瘦身作用。
山楂枸杞茶适用之人
瘦身人。山楂枸杞茶具有减肥功效,因此对于那些大鱼大肉而导致肥胖人,可以清除体内油脂,达到减肥瘦身效果。
工作族。山楂枸杞茶具有明目的功效,因此对于那些长时间工作一族来说,饮用山楂枸杞茶具有缓解眼睛疲劳功效,可以提高工作效率。
胃口不好之人。山楂枸杞茶因含有山楂,其味道酸甜,具有开胃功效,因此对于胃口不好之人,可以起到开胃作用。
饮用山楂枸杞茶禁忌
山楂枸杞茶不宜和猪肝同吃。因山楂枸杞茶含有丰富维生素,猪肝里含有铜、铁等金属微量元素,同吃使维生素C被加速氧化,破坏降低了营养价值,故山楂枸杞茶和猪肝不宜同吃。
山楂枸杞茶和含维生素分解酶果蔬不宜同吃。南瓜、胡萝卜、柠檬和黄瓜等果蔬里均含有维生素分解酶,和山楂枸杞茶同吃,会破坏分解山楂里维生素,降低营养价值,影响肠胃消化,故不宜同吃。
山楂枸杞茶和海产品不宜同吃。海鲜里均含有丰富钙、铁、碳、碘等矿物质和蛋白质,山楂里含有鞣酸,若和海产品同吃,会合成鞣酸蛋白,这物质会导致便秘,引发恶心、呕吐、腹痛等症状,所以不宜同吃。
山楂枸杞茶不能和人参同吃;枸杞一般不宜和桂圆、红参或大枣一块食用,否则容易过度温补,部分人会燥热上火。
山楂枸杞茶和维生素K3相克,维生素K3是止血药,山楂是活血药,其含有维生素C不利于维生素K3的止血作用。
山楂枸杞茶制作方法非常简单,山楂不仅可以开胃还可以减肥!瘦身族可以试一试山楂枸杞茶,能益气健身减肥,非常适合身体虚弱或长期坐办公室之人。
(感谢致富热网提供,若有侵权请告知。)
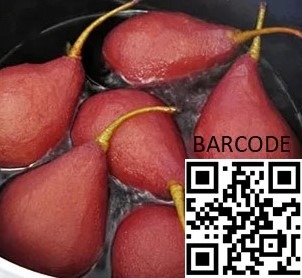

介绍酒燉鸭梨
酒燉鸭梨用料
酒一罐,糖适量,柠檬皮适量,鴨梨几个,桂皮一条
酒燉鸭梨做法
柠檬皮削好以后备用。
鸭梨削去皮,上面的梗留着,好用来摆盘。
去皮鸭梨准备好以后,放到燉锅里,倒入整罐酒,放入糖、柠檬皮和桂皮,如果喜好甜一些,可以在燉时斟酌再加一些糖。
大火烧开以后,用小火燉一小时,燉时可以翻动鸭梨一下,使其入味均勻。
燉后放至室温,然后放入冰箱冷藏鸭梨和汁一天,如此更入味。
饭后请享用。
(感谢ICOOK介绍酒燉鸭梨菜谱和提供照片,若有侵权请告知。)
樟茶鸭.........
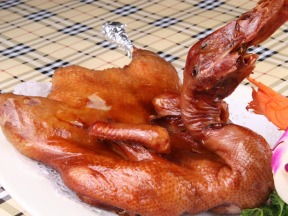

材料
鸭1只1900克,花茶、樟树木屑、酒醪汁各50克,稻草、松皮各500克,盐、香油各9克,料酒25克,花椒1克,胡椒粉1.5克,熟菜油900克
做法
鸭背尾部横开长口,去内脏、用料酒、酒醪汁、胡椒粉、盐、花椒拌匀,抹鸭身9小时捞出。
入沸水烫一下紧皮,沥干后放入熏炉,将花茶、稻草、松皮、樟树木屑拌匀做熏料,熏至鸭皮浅褐取出。
上笼蒸120分钟,放凉;熟菜油烧至九成热,放入熏蒸鸭,炸至鸭皮酥香。
(此文源自网络,若有侵权请告知)
AVOCADO PICKLE BURGER FOR YOUR PICNIC.........
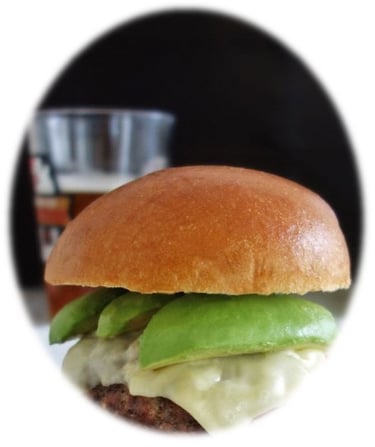

INGREDIENTS
Half Pound Ground Chuck Beef
1 Tsp Salt
Quarter Tsp Pepper
Half Avocados
Pickles
Lettuce
1 Slices Cheese
1 Burger breads
INSTRUCTIONS
Slice the avocado.
Get your grill/pan hot.
Salt and pepper the ground beef. Make into patties that are about 1/2 inch larger than the burger breads.
Put a thumbprint in the middle of the patty so it doesn’t puff up when cooking.
Grill your burgers for a few minutes on the first side.
Flip burgers and add cheese after a couple minutes. Put the bread face down on the grill. Cook for about 3 minutes.
Stack up the ingredients and enjoy!
(I appreciate Kyle for introducing the Avocado Pickle Burger recipe. Please let me know if it is against the copyright.)
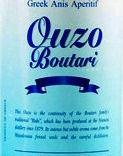

...介绍调制希臘鸡尾酒......
woodstockliquors.co.za/wp-content/uploads/2024/04/SKU10610.jpg
依次向调酒器里加入1杯希腊乌佐酒、1杯甜苦艾酒、1杯甜浆果酒,挤几滴柠檬汁,然后往调酒器里加冰,快速摇动调酒器, 最后将调好的酒倒入几个鸡尾酒杯里,可以享用鸡尾酒了!
(感谢红酒世界介绍调制希腊鸡尾酒,若有侵权请告知。)
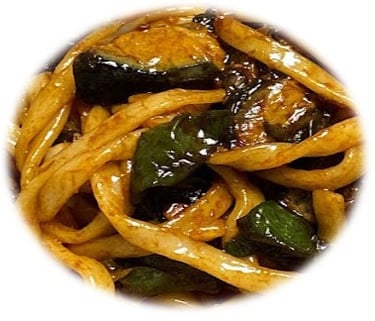

介绍螺丝椒皮蛋冷面.........
螺丝椒皮蛋冷面用料
螺丝椒切块
面
料酒
蒜末多准备些
蚝油
老抽酱油
生抽酱油
素油
皮蛋切小丁
螺丝椒皮蛋冷面做法
锅里多热些油,下螺丝椒翻炒,加1勺生抽酱油,将青椒炒到稍微断生状态。
下一半的蒜末和皮蛋翻炒,可以沿锅边淋一些料酒。
加1勺生抽酱油、半勺老抽酱油、1勺蚝油炒到入味,炒的过程加一些开水,需要有一些菜汁可以拌面用,不然拌面太干,调味要根据自己的用料量调整,尝咸淡。
最后放入剩余蒜末,再加些味素,不喜欢味素的可不放,翻炒几下关火。
另起锅烧面,烧好可以过冷水。
捞面入碗里,加青椒皮蛋,再淋些菜汁,搅匀以后享用。
(感谢下厨房介绍介绍螺丝椒皮蛋冷面做法,若有侵权请告知。)
介绍蓝莓杯子冰淇淋………
THE BLUEBERRY LEMON CUP ICE CREAM FOR DESSERT OR SNACK

蓝莓杯子冰淇淋材料
蓝莓300g
淡奶油190g
原味优格190g
砂糖70g
柠檬1个
蓝莓杯子冰淇淋做法
蓝莓、优格、砂糖和柠檬汁一起放进搅拌机搅均匀以后,放入冰箱充分冷藏3小时取出,加入淡奶油搅均匀,再倒进预冷好转动的冰淇淋机里,半小时以后,将做好的蓝莓冰淇淋放进杯桶里,再用冰箱冷冻半天,可以享用小吃甜点了。
(感谢百度介绍蓝莓杯子冰淇淋做法,若有侵权请告知。)
HOW TO OVEN BAKE STUNNING DRIED PEACH CHIPS SNACK
Oven dried peak-season peach chips are a delicious snack. Peach snacks can be enjoyed by everyone because they are vegan. Whole30 compatible and contain no added sugar!
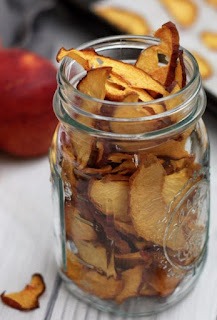

PREPARE TIME - 15 minutes
COOK TIME - 3 hours
TOTAL TIME - 3 hours 15 minutes
Ingredients
3 Peak-season peaches, peeled if not organic
Parchment paper
Instructions
Preheat oven to 200 degrees Fahrenheit. Line a baking sheet with parchment.
Clean and dry peaches. Slice in half and remove the pit.
Peel peaches if you prefer to not eat the peel or if they are not organic.
Slice peaches in 1/8 inch slices, reserve ends for another use. (Note - if you slice the peaches thicker, it will take longer for them to dry)
Place peach slices on parchment lined baking sheet, leaving space between each slice.
Bake at 200 degrees F for approximately 1 hours 50 minutes so the top of the peaches are dry.
Peel the peach slices from the parchment paper and flip over. Continue to bake for another 30 minutes to an hour so they are fully dehydrated.
Remove the dried peach slices from the oven and allow to cool completely. Put in an airtight container at room temperature. The peach chips can be stockpiled for several months at room temperature without spoiling.
(Thank feedthemwisely for sharing the above recipe. Please let me know if it goes against copyright.)
介绍酒酿巧克力吐司.........
INTRODUCING FERMENTED RICE CHOCOLATE TOAST FOR BREAKFAST OR SNACK
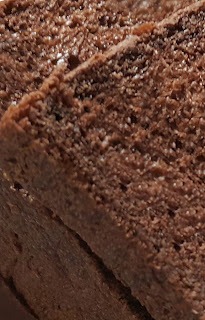

酒酿巧克力吐司用料
酒酿 600
水 90克
黑巧克力粉 30 克
面包粉 900克
油 50克
干酵曲 9克
细砂糖 90克
酒酿巧克力吐司做法
酵曲先加一些水搅拌起作用
面包粉、黑巧克力粉和细砂糖一起拌均匀
加入酒酿和酵曲搅拌均匀
若太干,加一些冷水进去,若不干,就可以少加或省略
揉出滑溜面团
加入油,揉面摔打至完全扩展阶段,即能拉出透明薄膜
分三个面团
面团盖上膜,第一次发酵面团
取出排气,醒面团30 min。将面团擀开擀长,
翻面,正面朝下
卷起来,收口按薄后捏紧,放入土司烤盒
再次发酵面卷至九分满,表面刷上油
烤箱预热190度,50分钟左右
酒酿巧克力土司出炉
刚烤出来有酒气,凉了没有酒味,出门不会酒驾。
(感谢下厨房介绍酒酿巧克力土司,若有侵权请告知。)
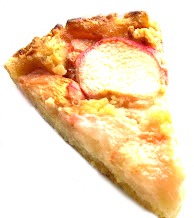

健康桃子派.........
SPRING SEASONAL HANDMADE PEACH DESSERT
今天买了一公斤桃,拿回来立即做个健康桃子派,甜蜜过夏天。 先来做派皮。
桃子派皮用料
面粉175克,蛋黄三个,糖60克,盐一小勺,牛油75克(室温放软),香草精一小勺。
桃子派皮做法
面粉放入一个大碗,加入糖、蛋黄、盐、香草精、牛油,用手将所有材料搅拌均匀,如果有点干,可以加少量水。将所有材料揉成一个不粘手面团,如果牛油太粘,可以再加些面粉。揉好的面团包入保鲜膜,放入冰箱冷藏30分钟。
拿出冰过的面团,用擀面杖做成圆盘形。取一个派皮专用模具,抹上牛油,将派皮铺入,把模具放入冰箱,馅料准备好以后再拿出。
接下来准备馅料。这个桃派食谱源自诺曼底,由杏仁粉、牛油和蛋组成馅料。诺曼底地区天气寒冷,所以各种食物里总少不了牛油。怕胖的人可以少用些,或者用低脂人造奶油代替。
桃子派馅料
杏仁粉125克,牛油90克(室温放软),细砂糖80克,蛋一个,再加蛋黄一个,樱桃酒一汤勺,面粉两汤勺,桃六个
桃子派做法
软牛油放入一个大碗,用木勺搅打到完全松软,加入细砂糖用力搅打,再加入蛋和蛋黄打均匀。最后加入樱桃酒、面粉和杏仁粉,搅拌均匀后铺入挞皮上,用勺子抹均。
烤箱预热200摄氏度。六个桃去皮切片,铺在杏仁牛油粉浆上。把桃派放入烤箱200摄氏度先烤12到15分钟左右,派皮变色后烤箱调到180摄氏度,继续烤25到30分钟,等牛油杏仁馅凝结起来就可以了。
这个桃派要放凉了再吃,夏天凉台上,晚餐又多了一个健康甜品。小西说,这个为最迷人桃子派哦。
(The author of this article is Ida. Please let me know if it goes against copyright.)
介绍杏桃味酱油火雞.........
帅气火鸡原产北美洲,鸡形目鸟类,开放林地最大的鸟类,相对一般禽类更大,重达9公斤左右,目前商店所买火鸡由野生火鸡驯化得来。
火鸡来源丰富,烤火鸡成了美国人大菜,在节假期季节,除了鸡尾酒,火鸡必不可少。
火鸡富有营养价值,富含铁、锌、磷、钾和维生素,属价格便宜品质上好禽类,低脂肪,能够防治心脑血管疾病,还可协助人们消除紧张和减轻压力。
火鸡生长快,个大肉味美,被我国列入开发致富项目,发展前景非常乐观。
(感谢A医学百科介绍火鸡,若有侵权请告知。)
以下介绍杏桃味醬油火雞做法。
烤火鸡用料
火鸡 - 1隻
柠檬 - 1颗,切半
雞调味粉 – 1大勺
大蒜 - 1个,压碎
油 - 4勺,软化
胡椒粉 – 半大勺
生抽酱油 - ⅓杯
柠檬皮- 1大勺
杏桃果酱 - ⅔ 杯
醋 – 1勺
火鸡烤制法
将烤箱內烤架移至低位。烤箱预热至390ºF。取出火雞在室溫下放置。用厨房纸巾轻拍干火雞。将半颗柠檬和蒜放入火雞肚子里。将雞调味粉、油和胡椒粉搅在一起。把搅好的油涂抹在整隻火雞上。把翅膀塞在火雞背后。
在烤盘倒入 1 杯水。將火雞放在烤盘上,火雞背部朝下。
下火烤30分钟,然后用锡纸将火雞稍微包裹起來,溫度降低至 325ºF。继续烤2小时左右直到火雞内部溫度达到 165ºF。
烤制火雞时,在锅里倒入杏桃果酱 、柠檬皮、醋、生抽酱油和1瓣碎大蒜,用小火加热,收汁变浓稠状。将酱汁取出倒到一个小碗里,冷卻到室溫。
從烤箱里取出火雞拿掉锡纸。将酱汁涂抹到整个火雞表面。再把火雞放回烤箱烤9分钟。将火雞从烤箱里取出,再次刷上酱汁。
(感谢Kikkoman提供杏桃味酱油火雞做法,图源自n9.cl/l3ou6,若有侵权请告知。)
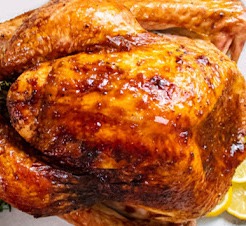

介绍泰式酱鸭三文治
某一天,意外买了一瓶泰式李锦记甜辣酱,迫不及待打开试了下味道,还不错,可看到营养表才知道被骗了,泰式李锦记酱其实每20G有197KJ,相当于50卡,虽然这样看起来脂肪含量较低,可50卡每20G热量不小。
由于泰式李锦记酱酸甜恰到好处,那么就开始研究如何适应它能达到低卡效果,如果只使用泰式李锦记甜辣酱起到调味效果,那么25卡绝对能接受,和健康食物搭配,热量更能得到控制。
鸭肉低脂肪,买了黑胡椒鸭肉,锅里煎了一下,铺了一片甘蓝蔬菜,放了一些豆粒,淋了泰式李锦记甜辣酱,有人试着加几片酸瓜(pickles),泰式李锦记鸭肉三明治很美味!
(感谢小夏聊家电在知乎分享上图和烹饪方法,若有侵权请告知)

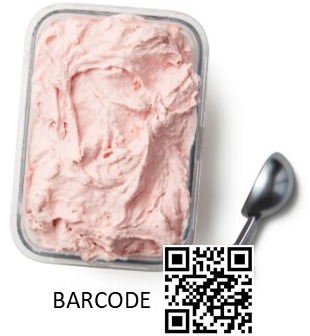

DAILY FREE STRAWBERRY ICE CREAM.........
Ingredients
1 and 1/2 cup plain soy milk
3 cups raw cashews
9 strawberries
1/3 cup syrup
1/3 teaspoon vanilla extract
Instructions
Make sure your ice cream maker barrel is fully frozen.
Soak the cashews in hot water for at least a half hour. One - three hours is preferred for creaminess. However, it is not necessary.
Drain the cashews and add them to a high speed blender. Also add in the soy milk, syrup, vanilla and nine clean strawberries. Blend from low to high so it is silky smooth.
Assemble your ice cream maker and turn it on. Pour in the strawberry and cashew mixture. Allow to churn for about nine minutes.
Transfer the ice cream to a freezer-friendly container and chill for a half hour to slightly thicken - this is best for scooping, though you could just soft-serve it right away, straight from the ice cream maker. Enjoy!
Covered the leftover and put it in the freezer.
(I appreciate Ms. Kathy Patalsky for providing the above recipe. Please let me know if it is against the copyright.)
九制桃李干
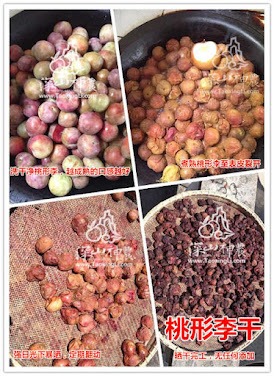

taoxingli.com/e/d/file/p/2019/01-03/2b07062daacdcdac2b3f2f8ad50a09d1.jpg
制作桃李干步骤如下。
挑选熟透桃形李,洗干净,放入锅里煮,无需加水,推荐中小火慢炖。桃李果本身含有高甜度,无需添加任何调料。
待果熟透,果皮开裂,取出,若有闲情可以去核。
强烈阳光下暴晒三天,晒干中途将桃李果翻动一下,放入袋中密封,可保存1-3个月。
(感谢深山神农上传此制作方法,若有侵权请告知)
介绍马铃薯块咖喱鸡.........
马铃薯块咖喱鸡用料
童子鸡 5块
咖喱 35g
马铃薯 3个
洋葱 半个
胡椒粉 少许
糖 少许
盐 少许
生抽 1勺
料酒 1勺
素油 少许
做法步骤介绍
马铃薯去皮切丁,切成1寸左右小方丁。
洋葱去皮切丁,切成1寸左右小方丁。
小童子鸡冲洗干净切丁。
炒锅倒油将马铃薯过油煸炒1分钟盛出锅。
用锅里油再炒洋葱,然后把洋葱铲到锅一边。
继续用剩油倒入鸡丁翻炒,加入料酒、胡椒粉、糖。
将马铃薯丁放入锅,加入生抽翻炒,锅里加入水,没过马铃薯丁。
加入咖喱,烧至锅里汤浓稠就可以了。
盛盘。
(感谢美食天下分享清水鱼翅的作品,若有侵权请告知。)

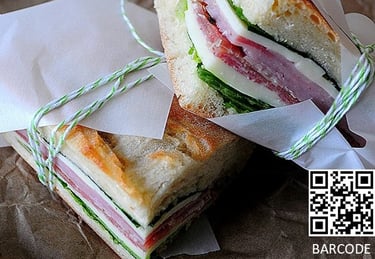

PRESSED PICNIC SANDWICH.........
Ingredients
Ciabatta loaf
Prosciutto
Salami
Oil vinegar mix
Provolone
Lettuce
Instructions
Cut long ways down the entire bread and open it up.
Add cheese on (I cut my slices in half and placed on each side of bread).
Add lettuce.
Add prosciutto.
Drizzle a bit of oil (placing it in between meats will prevent bread from getting soggy).
Add salami.
Add any other items you may want for example, roasted peppers are good here).
Close the bread.
Wrap in saran wrap.
Place it in the fridge with a heavy weight on the top.
When ready to leave, unwrap and rewrap with wax paper, slice up on the diagonal.
(I appreciate Tracie for sharing the above recipe at Cleverly Inspired website. Please let me know if it is against the copyright.)
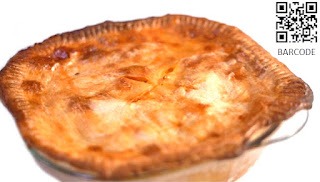
介绍泰式咖喱鸡肉派.........
泰式咖喱鸡肉派用料
900 克鸡肉
1 根泰辣椒
2 片酥皮
3 瓣大蒜
360 克椰浆
1 个柠檬
适量调味粉和黑胡椒
90 克毛豆
35 克泰咖喱酱
1 把青葱
1 个大马铃薯
适量防粘喷雾
泰式咖喱鸡肉派步骤
预热烤箱至410F。
将泰辣椒去籽切丁, 青葱切末大蒜切碎; 马铃薯去皮后切片。
鸡肉切小块。
碗里加入椰浆和柠檬汁, 泰咖喱酱和大蒜搅拌。然后加调味粉和黑胡椒适量 ,搅拌均匀。
加入辣椒和葱,搅拌均匀。加入鸡块,搅拌均匀,然后静置片刻,让鸡肉充分吸收咖喱和椰子味。
在一个9英寸的烤盘上喷洒适量防粘喷雾,然后在里面放1片酥皮,压在角上。确保它覆盖在烤盘里面。在底部放一层马铃薯,然后是毛豆,最后把搅拌物倒在上面。
上面铺上1片酥皮。用叉子按下边缘来密封。在顶部切几个口子。
烘烤1小时左右。
让派冷却片刻后享用。
(感谢晒厨易分享泰式咖喱鸡肉派,若有侵权请告知。)

介绍制棉花糖冰淇淋
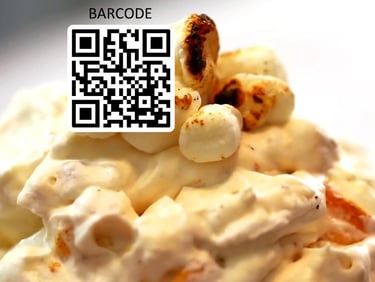

棉花糖冰淇淋原材料
900ml 冰淇淋
9个 大颗棉花糖
棉花糖冰淇淋做法
烤棉花糖。 趁棉花糖很软却不很烫时,将它倒入冰淇淋里,一直搅至均匀。 倒入可密封的大容器里,放入冰箱里至少半天后享用。可保存6周。
(感谢Gemma Stafford介绍制作棉花糖冰淇淋方法,若有侵权请告知。)
美味破鸭蛋。。。。。。。。。
美食文化可谓博大渊源,美食品类繁多数量更是数不胜数,有很多很有特色,今天小编给大家介绍一道堪称是神奇的美食,为啥说神奇呢?让我们一起来看。
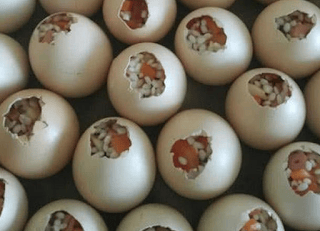

这道美食做法很奇特,食材有鸭蛋,糯米,绿豌豆,腊肉等,制作开始,先将鸭蛋洗干净,然后再在鸭蛋顶部敲碎,倒出蛋清。糯米最好提前浸泡半小时左右,因为这样做出来的鸭蛋才软糯好吃,一切准备就绪后,继续下一步! 将腊肉切成肉末,然后和绿豌豆以及浸泡好的糯米搅拌在一起,再放点生抽老抽酱油等佐料调配成鸭蛋馅料,之后用小筷子将这些馅料装进鸭蛋里,需要注意的是馅料不能装得太满,因为后面在蒸熟的过程中馅料会膨胀,若是装得太满鸭蛋会被撑裂开!
在装好馅料的鸭蛋外滚裹上锡纸,防止在蒸时馅料会洒出来,如此这般后,再将这些鸭蛋放进锅里蒸煮1小时!
最后大功告成,蒸熟后的糯米鸭蛋造型奇特,香味扑鼻,吃起来软糯可口味美无比,剥开蛋壳后你会发现里面的馅料早已闪亮剔透!只有神仙才能吃到这么好吃的美味,一般人根本吃不到啊!
鸭蛋敲破以后,竟能做成神奇美食,真是没想到,很多吃货看后述说这是第一次见到这美味,你们有吃过这神奇蛋吗?
(感谢搜狐提供,若有侵权请告知)
介绍做九层塔三杯鸡
九层塔三杯鸡,三杯代指麻油、料酒、蚝油三调料 。
鸡切块;蒜剥皮,姜切片,辣椒斜刀切段 。
起锅,倒入麻油和蔬油各一半,油热下姜片、蒜、辣椒段,爆炒;下鸡块,大火,翻炒。
保持大火,倒入酒,转动锅子,以便酒燃烧;加入蚝油和糖,翻炒酱汁和鸡均匀;然后煎煮片刻 。
烧热锅,倒入适量麻油,放入九层塔,趁热倒入鸡块,撒一把葱酥,加盖;把火调到最大,沿着锅盖淋料酒;15秒后,开盖 。
请享用!
(感谢微博18618395150介绍麻油九层塔三杯鸡,若有侵权请告知)

介绍鱿鱼油梨三文治.........
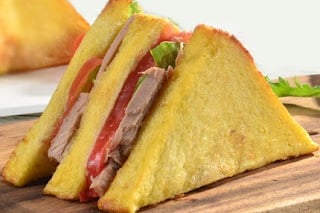

小鱿鱼油梨三文治非常适合用作野餐
鱿鱼油梨三文治用料
切片面包、生菜、小鱿鱼、红甜椒、沙拉酱、大蒜片、番茄、黄油、油梨和午餐肉各适量。
鱿鱼油梨三文治做法
将番茄切片,红甜椒切丝,蒜切片、油梨和午餐肉各切片。
将鱿鱼洗净,焯烫熟,捞出来切段。
将切片面包抹匀黄油烘烤,取出修去硬边,对切半。
在烤面包上摆放生菜、番茄片、红椒丝、大蒜片、油梨片、鱿鱼段和午餐肉片。
挤上沙拉酱即可。
(感谢百度介绍小鱿鱼三明治,若有侵权请告知。)
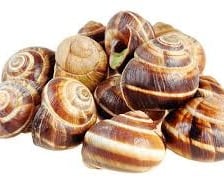

介绍蜗牛寓意和做法
蜗牛公母同体,柄眼目蜗牛科软体动物,眼睛长在头部的后一对触角上,拥有几千颗牙齿,野生蜗牛一般只有不到9公分,它们无论行走到哪里都将留下足迹,蜗牛寓意坚持不懈,它们即使走在刀刃上都不会有危险。
盐无法和蜗牛共存,盐如果洒在蜗牛身上,蜗牛就会脱水,可因为蜗牛有螺状碳酸钙壳保护,所以还有活命良机。蜗牛天敌很多,甚至人都以蜗牛作为食物。蜗牛富含钙、铁、铜、磷、维生素、氨基酸和丰富蜗牛酶,被称作肉黄金。熟蜗牛肉均匀裹上酥炸粉,放入约190度热油锅炸一下,捞起沥干油,佐以调味酱就可上桌了。
Recipe of Alcohol Free Vanilla Passion Fruit Lemonade Mocktail.........
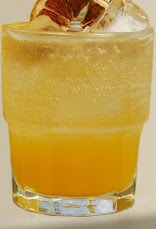

odkmixers.co.uk/wp-content/uploads/2019/07/vanilla-passion-fruit-lemonade.jpg
Ingredients
400 ml Lemon Juice
190 ml Passion fruit Puree
190 ml Vanilla Syrup
Instructions
Simply pour 50ml ingredients over ice in the cup, fill with soda water and stir.
It is a delicious mocktail for improving your health.
(I appreciate ODK for sharing the above recipe. Please let me know if it is against the copyright.)
介绍制作西班牙果酒
桑格利亚酒


把柠檬、草莓和桃子等水果切片放入杯里。
加入一勺糖,倒入酒, 盖上盖子放冰箱里冷藏。
喝前加入一些冷汽水,可以享用桑格利亚酒啦!
(感谢西班牙导游介绍制作桑格利亚酒,若有侵权请告知。)
野米马铃薯烤童子鸡
ROASTED CHICKEN WITH RICE AND POTATOES
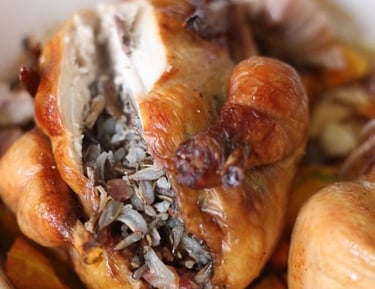

野米又称菰米,野米和稻米不同,它外壳灰黑不用打磨,野米含有丰富氨基酸、维生素和矿物质,野米里蛋白质、微量元素和纤维素多,是难得保健米。
下面介绍野米马铃薯烤鸡做法。用童子公鸡,更容易烤熟,若人多,一次烤几只,鸡腿鸡翅多,每个人都能分到鸡腿和鸡翅。肚子里塞野米和腊肉,不仅能增加额外香气,烤熟后野米还能当饭吃,有嚼劲。
马铃薯童子烤鸡用料
童子公鸡 3只
加拿大野米 190g
腊肉 1块
马铃薯 300g(去皮)
大蒜 三头
生抽酱油 1小勺
老抽酱油 1小勺
料酒 3大勺
黑胡椒、白胡椒 适量
姜粉 适量
马铃薯童子烤鸡做法
洗净沥干童子公鸡,用生抽酱油、老抽酱油、料酒,姜粉、白胡椒粉和黑胡椒粉抹匀童子公鸡表皮和里面,冷藏几小时入味。
烧好野米饭,腊肉切小粒,和野米饭拌匀备用。
拿勺子舀野米腊肉,填入童子鸡内,用力压实填满。
用竹签把填米饭的开口封住,或用大号针穿棉线缝起来。
马铃薯切滚刀块,蒜不用剥皮,整个拦腰对切,和马铃薯块一起铺在烤盘里。
将鸡腿鸡翅固定好,摆一个帅气造型。
在童子鸡表面和马铃薯里,淋上一些油,烤箱预热190度,烤1小时左右,烤到马铃薯能用叉子戳透,童子鸡表皮有油冒出,即可端出享用。
各个烤箱火力不同,如果烤箱容积小,要即时遮盖锡纸,别烤糊。
(感谢下厨房介绍野米马铃薯童子烤鸡做法,若有侵权请告知。)
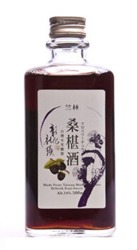

桑葚酒.........
桑葚酒原料
桑葚 – 300克
冰糖 – 90克
糯米酒 – 500毫升
桑葚酒做法
备完整的桑葚,摘去坏桑葚
桑葚去掉果柄,用冷开水泡洗干净
桑葚晾去水份
取一干净瓶子,放进桑葚
再放一层冰糖
一层桑葚一层冰溏
加入糯米酒
在凉爽地放置1个月左右可享用
若放置3个月到1年,味道更浓郁
(感谢火镀红叶作品提供,若有侵权请告知。)
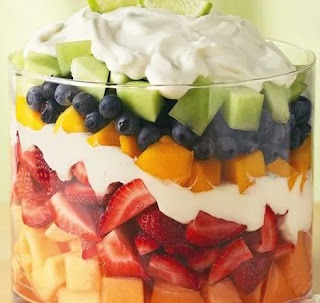
9 LAYER GLUTEN FREE FRUIT SNACKS FOR YOUR HEALTH

Ingredients
1/3 Cup chocolate chips 3 Ripe avocados 1/3 Cup unsweetened cocoa powder 9 Tablespoons maple syrup 3 Tablespoons olive oil of choice 1 Teaspoon vanilla extract Berries and pecan for garnish, if desired
Instructions
In a microwave safe bowl, melt the chocolate chips in the microwave (stirring in between).
Add avocados, cocoa powder, maple syrup, vanilla, olive oil and melted chocolate chips to the bowl of a food processor fitted with a blade. Process them to be very smooth.
Portion them into single cups, garnish with berries and pecan if desired. Refrigerate them so it will be ready to serve.
(It refers to the recipe from Juggling with Julia. Please let me know if it is against the copyright.)
NINE UNBELIEVABLE GREEN DESSERTS THAT MADE WITH MATCHA RECIPES
Matcha Ice Cream
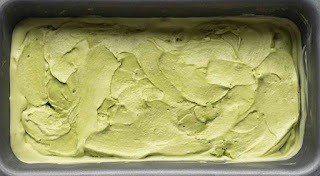

INGREDIENTS
600ml Heavy cream
300ml Condensed milk
3 tablespoon Matcha powder
INSTRUCTIONS
Put the heavy cream in the bowl of a stand mixer fitted with a whisk attachment or in a large bowl and beat it with an electric mixer so that it stands at medium-stiff peaks
Add the condensed milk and whisk/incorporate them completely
Sift in matcha powder (adjust according to your personal preference) and mix/combine them smoothly
Transfer the mixture into an airtight container and place in the freezer to chill for 6 hours or longer before serving.
Cookie Dough Cups
cappellos.com/cdn/shop/articles/Screen_Shot_2020-12-29_at_12.14.28_PM_1920x.png?v=1609262227
INGREDIENTS
1/3 package Cappello’s Chocolate Chip Cookie Dough
2 cups matcha chocolate chips
1 tablespoon oil
1 teaspoon matcha powder
INSTRUCTIONS
Line a muffin tin with 9 paper cupcake liners.
Make 9 pieces of cookie dough, Freeze them for half an hour.
Melt the matcha chocolate chips with oil, stirring often.
Remove from heat, stir in matcha powder and combine them.
Add approximately 1 tablespoon of melted chocolate to each muffin tin cup. Tap the muffin tin on the counter so the chocolate distributes evenly.
Gently place one cookie dough disc into the center of each cup.
Top with another tablespoon of melted chocolate. Tap on the counter again or gently shake so the chocolate settles.
Freeze 9 cookie dough cups for half an hour or longer before enjoying.
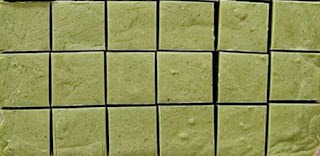
Fudge

https://sweetmouthjoy.com/wp-content/uploads/2023/01/how-to-make-matcha-fudge-recipe-method-5-6.jpg
INGREDIENTS
3 1/2 cups matcha chocolate chips
1 (300 mL) can sweetened condensed milk
1 tablespoon butter
1 teaspoon vanilla extract
1 teaspoon matcha powder
INSTRUCTIONS
Line an 8 inch square pan with baking sheet. Set aside.
In a large microwave safe bowl, melt the matcha chocolate chips, condensed milk and butter in the microwave for 30 second intervals, mixing them smoothly.
Incorporate/mix in the vanilla extract and the matcha powder.
Pour the fudge mixture into the prepared pan. Refrigerate for at least 2 hours.
When hardened, slice into squares. Enjoy!
Cookies
theclassybaker.com/wp-content/uploads/2022/05/matcha-cookies-17.jpg
INGREDIENTS
2 3/4 cups flour
1 teaspoon baking soda
1/2 teaspoon baking powder
1 cup butter softened
1 1/2 cups sugar
1 egg
1 teaspoon vanilla extract
2 1/2 teaspoon matcha green tea powder
INSTRUCTIONS
Preheat oven to 375°F. In a small bowl, stir together flour, matcha green tea powder, baking soda, and baking powder. Set aside.
In a large bowl, cream together the butter and sugar smoothly. Add in egg and vanilla. Gradually blend in the dry ingredients. Roll dough into balls about one inch in diameter and flatten slightly to create round discs, and place onto cookie sheets.
Bake 7 minutes in the preheated oven. Let stand on cookie sheet few minutes before removing to cool on wire racks.
Tiramisu
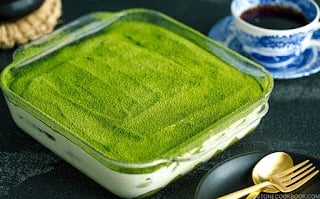

justonecookbook.com/wp-content/uploads/2019/11/Matcha-Tiramisu-6372-I-2.jpg
INGREDIENTS
For the mascarpone cream
3 eggs
5 tablespoon granulated sugar
500g mascarpone
For the dipping sauce
1/4 cup boiling water
2 tablespoon matcha powder
1 tablespoon granulated sugar
1/4 cup cold milk
For the layers
Dry biscuits
Matcha powder to sprinkle
INSTRUCTIONS
Put the eggs and sugar in a bowl, then beat them using a stand mixer so that it is fluffy and light, doubled in size.
Once the sugar is fully dissolved, add the mascarpone and mix it.
Set the mascarpone mixture aside and prepare the dipping liquid for the biscuits. Mix boiling water with matcha powder and sugar. Make sure both the sugar and matcha powder are fully dissolved.
Once they are fully dissolved, add some cold milk and mix.
Layer the biscuits that has matcha sauce in the baking dish of your choice. Add a thick layer of the mascarpone on top, then sprinkle some extra matcha.
Shortbread

kirbiecravings.com/wp-content/uploads/2011/07/IMG_3547-200x200.jpg
INGREDIENTS
3/4 cup confectioner's sugar
1 1/2 tablespoon matcha green tea powder
5 ounce unsalted butter cubed
1 3/4 cup flour
3 large egg yolks
1 cup granulated sugar
INSTRUCTIONS
Preheat the oven to 350°F. Line a baking sheet.
In the bowl of a stand mixer, whisk the confectioner's sugar and matcha powder. Add the butter and mix them so that the mixture is smooth and light in color. Add the flour and continue mixing/combining. Add the egg yolks and mix so that they are incorporated and a dough forms. Transfer the dough to a clean surface and form it into a disc. Wrap it in plastic wrap and chill it in the refrigerator for half an hour.
Roll the dough to half inch thickness. Slice cookies with a cookie cutter. Coat each cookie with the granulated sugar and place them on the baking sheet. Bake the cookies for about quarter hour. They are lightly golden around the edges.
Matcha Pudding

bubbletea.com.au/site/images/source/matchapudding1.jpg
INGREDIENTS
1 tablespoons Matcha Green Tea Powder
1 cup Milk
1 cup Heavy Cream
3 tablespoons Sugar
1 teaspoon Gelatin Powder
INSTRUCTIONS
Pour the milk in a pan and add the matcha green tea powder, sugar and gelatin.
Heat the pan on low heat and gently mix the ingredients and melt them in the pan.
Cool the pan with cold water and add fresh cream. Mix them.
Pour the matcha green tea filling into cups.
Place the cups in a refrigerator for about hours before serving.
Serve with whipped cream on top.
Matcha Pound Cake
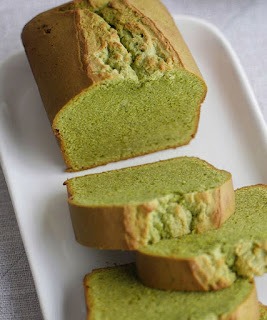

indulgewithmimi.com/wp-content/uploads/2020/05/matcha-loaf-cake-easy.jpg
INGREDIENTS
160 g cake flour
3 tablespoon matcha powder
¾ teaspoon baking powder
⅛ teaspoon sea salt
180 g granulated sugar
160 g butter at room temperature (unsalted)
135 g cream cheese (note 1)
3 large eggs at room temperature
Instructions
Pre-heat oven to 325 F
Soften cream cheese in the microwave. It should be at a spreadable consistency.
Sift together cake flour, matcha powder, baking powder and salt. Make sure leavening agent is evenly dispersed throughout dry mixture. Stir to incorporate. Set aside.
In a stand mixer with the paddle attachment, beat sugar and room temperature butter together on medium speed so that it is fluffy.
Add softened cream cheese into mixture, beat on medium-low. Do not over beat.
Add room temperature eggs one at a time and beat on medium-low so that it looks smooth and creamy.
Pause mixer, add dry ingredients into the wet batter in 3 separate additions. Beat on the lowest setting. Almost every dry ingredient inside bowl are no longer visible.
Turn off mixer, take the bowl out and scrape down the sides, gently fold in the rest of the dry ingredients.
Transfer batter into a loaf pan lined with baking sheet.
Bang the pan on the counter several times to remove excess air.
Bake for 40-50 minutes. Insert a skewer. It should come out clean. The cake will look golden.
Let it cool in the pan for 5 minutes before transferring to a cooling rack.
Once cooled, keep cake at room temperature in an air tight container. Enjoy!
(If placing in the fridge, let it come back to room temperature about half an hour before serving.)
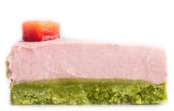
Matcha Strawberry Bars
INGREDIENTS
Matcha Crust
3/4 cup oil
2 ounce granulated sugar
1 teaspoon vanilla extract
190 grams gluten-free flour
1 tablespoons matcha
Strawberry cream
60 grams cold water
2 1/4 tsp powdered gelatin (one standard packet)
2 cups heavy cream
1 tablespoons granulated sugar
1 tsp vanilla extract
1/4 tsp salt
3 tablespoons strawberry jam
Pink or red food dye (optional)
Topping
Strawberries, sliced thinly (optional)
INSTRUCTIONS
Matcha crust
Preheat oven to 325°F and line a 9 inch square baking tin with baking sheet, making sure it's pressed closely against the sides of the tin. The baking sheet should extend at least 1 inch up the sides of the tin.
In a medium bowl, use a stand mixer to cream together the butter and sugar so that it is light and fluffy. Add the vanilla and mix them. Add 190 g gluten-free flour and matcha powder and mix on medium speed to form a cohesive dough.
Press the dough evenly onto the bottom of the tin, making sure to press against the sides of the tin so that there is no space between the baking sheet and the dough. I like to use a metal measuring cup to flatten the dough evenly.
Bake for about 19 minutes. It'll be soft and puffy when you take it from the oven and will solidify as it cools. Remove from the oven and place in the fridge to cool while you make the strawberry cream.
Strawberry cream
Place 60 g water in a bowl. Sprinkle the surface of the water with gelatin powder and leave to bloom.
In a medium pan, add heavy cream, granulated sugar, vanilla, salt, and strawberry jam. Place on the stove over medium heat, stirring constantly so that the sugar and the jam have dissolved. This should take about 5 minutes. Do not let the cream come to a boil. Mix in a dab of pink or red food coloring to help create a more vivid pastel pink.
Remove the pan from the heat and stir in the gelatin so it dissolves. Let cool for 3 minutes.
Remove the matcha crust from the fridge. It should be firm to the touch. Gently and slowly pour the strawberry cream on top of the matcha crust. Carefully transfer the tin to the fridge and let set for 6 hours or longer.
Slice and serve
Once the snack bars are set, slice into 16 equal pieces. Put healthy sliced strawberries on top of the bar.
(I appreciate many websites for sharing the above recipes. Please let me know if it is against the copyright.)



介绍几种无酒鸡尾酒
ALCOHOL FREE COCKTAILS
青柠草莓无酒鸡尾酒
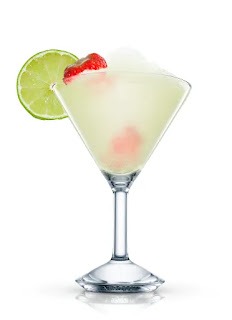

用料
冰块
9 整个 草莓
1 份 青柠汁
⅔ 份 糖浆
1 份 水
1 块圆形 青柠
1 整个 草莓
制作
在搅拌机里装满冰块。 添加所有原料。 搅拌、倒入到鸡尾酒杯里。 用青柠 、草莓装饰。
咖啡无酒鸡尾酒饮品
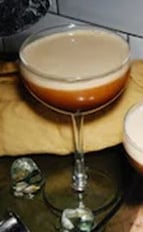

用料
冰块
1 份 意大利式特浓咖啡(冰)
半份 香草糖浆
半份 水
1 整个 咖啡豆
制作
在摇酒壶里装满冰块。 添加所有原料。 摇匀、过滤到冰镇鸡尾酒杯里。 用咖啡豆装饰。
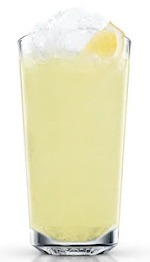
柠檬无酒鸡尾酒饮品
用料
冰块
1 份 柠檬汁
½ 份 糖浆
2½ 份 苏打水
柠檬
制作
在长水杯里装满冰块。 添加所有原料。 用柠檬装饰。
Thank absolutdrinks.com so much for sharing the alcohol – free cocktails. Please let me know if it goes against the copyright.

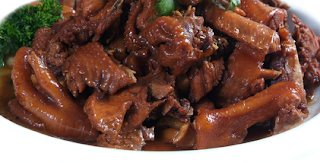
红烧老公鸡做法介绍
编辑 - 礼梅

shorturl.at/B5DUE
老公鸡含有丰富营养以及可以利于我们身体保健的各种物质,鸡肉制作方法非常多样,不管炖鸡,或炒鸡,不同的烹饪方式,带来的味道不一样,下面就来看红烧老公鸡的做法。
用料 - 老公鸡一只。
配料 - 干红辣椒9颗左右,鲜尖辣椒9颗左右,
佐料 - 葱一棵,姜一大块,蒜瓣9瓣左右、整花椒一汤匙,大茴香几颗、豆油、酱油、醋、味素。
红烧老公鸡做法介绍
一、备料
老公鸡剁块,鸡块不要太小,约3公分见方,鸡头鸡爪留整的。
干红辣椒切段、葱切段、姜切大片、蒜切片或刀拍扁、鲜尖辣椒切成小段备用。
二、紧水
锅热后不放油,将剁好的鸡块放入锅内翻炒,直至将炒出的水紧干,鸡肉开始收缩,尚未炒糊。将紧干水的鸡块盛入菜盆备用。
三、红烧老公鸡
锅热后放入适量豆油或色拉油,油热后将整花椒、大茴香、干红辣椒放入锅内炝一下,确保不被炝糊,将鸡块倒入锅内翻炒数遍,部分鸡块开始冒油后,用酱油喷一下,酱油要多放,类似于烧红烧肉,鸡块上色之后喷适量醋,再翻炒一下,然后将葱、姜、蒜放入锅内再次翻炒几下,蒜留一半最后用,放入适量食盐,然后放入热水,以淹没鸡块为准,用大火烧,直到锅内水被基本收干,仅剩一点浓浓的菜汁为止。
四、提味以后盛盘
将鲜尖辣椒、剩下的蒜放入锅内,翻炒几下,以辣椒断生为准,放入适量味素,翻炒一下之后盛入菜盘食用。
(感谢健康饮食介绍老公鸡做法,若有侵权请告知。)
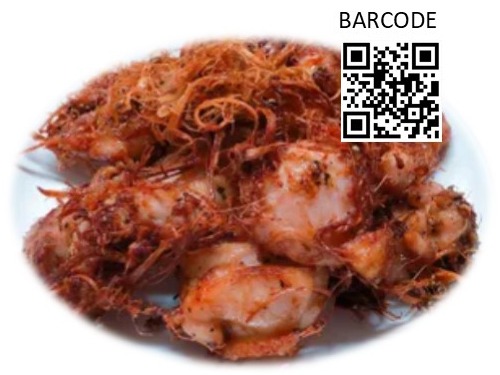

介绍泰式柠檬草炸鸡
THAI FRIED CHICKEN
泰式柠檬草炸鸡配方
半斤鸡肉,半小匙糖,1小捆柠檬草,1大匙大蒜泥,1大匙料酒, 1小匙胡椒末,香菜根1个,1大匙李锦记蠔油,半大匙泰式鱼酱,1大匙淀粉
泰式柠檬草炸鸡做法
柠檬草切段,然后用杵捣碎,
鸡切块,加入捣碎的柠檬草,
再加入大蒜泥、胡椒末和捣碎的香菜根,
放入泰式鱼酱、料酒、蚝油、糖和淀粉,搅匀后放置至少一小时。
以油温160度,炸3分钟左右即可
炸好的鸡块可以搭配泰式甜辣酱一起享用。
(感谢Charlotte Huang和GoogleAI介绍泰式柠檬草炸鸡,若有侵权请告知。)
介绍山东特产糖三角.........
山东特产糖三角不难做,和面相对馒头软一些,好让糖能渗透进去,相对包子硬一些,整出来会饱满一些,以下是糖三角做法。
馅用料
面粉 90克
红糖 150克
面团部分用料
面粉 600克
酵 6克
温水 270克
白糖 15克
糖三角做法
先和面,酵直接用温水冲开了,这样更好发酵。
面粉,糖,酵全部放在盆里,揉好面团以后,盖上保鲜膜发酵。
发酵至大了一倍就可以了。
揉面排气以后,平均分19等份。
搓团后盖上保鲜膜松弛一下。
松弛面团时调馅,红糖和面粉调好,一起放入碗里拌匀即可
松弛好的面团擀成薄一些的大面片,就跟包子差不多了,相对包子皮稍厚一些。
放上调好的馅。
糖三角先捏一边,再捏另一边,最后把三个边捏紧实。
整整齐齐的19个糖三角,放蒸锅里发酵半小时。
上气后蒸12分钟,焖3分钟再开锅。
焖好后拿出来就可以了。
小贴士
如果你的面太粘就要在面板上撒些面粉。
如果觉得太甜,下次做时再加些面粉。
(感谢小吆果在下厨房介绍山东特产糖三角做法,图源自shorturl.at/VM0Ze,若有侵权请告知。)
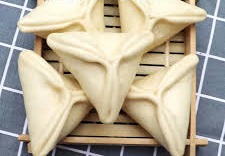

介绍怎么做芥末鱿鱼
山东鱿鱼非常有名气,野生鱿鱼营养更丰富,含有大量氨基酸和蛋白质。可抑制血液胆固醇含量,缓解疲劳和恢复视力,接下来就做一道芥末鱿鱼。


芥末鱿鱼用料
鱿鱼 3只
芥末 适量
鱼生酱油 适量
姜丝 适量
调味料 少许
芥末鱿鱼做法
鱿鱼洗干净,撕去膜,切块状,加少许调味料,放置一会儿,再洗净。
准备一个小碟,倒入适量鱼生酱油,挤入芥末,吃前搅均匀。 如果没有鱼生酱油,请用普通生抽代替。
锅中放姜丝,水烧开,下入鱿鱼块。
大火烧。
看见水烧开立即把鱿鱼捞出沥干装盘。
美味端上桌。
搭配芥末蘸着,享受清新海鲜美味。
小贴士
鱿鱼不能久煮,水烧开放鱿鱼,再次烧开即刻捞出,这样做出来,鱿鱼味道鲜美非常好!
(感谢Maggie在下厨房介绍芥末鱿鱼,若有侵权请告知。)
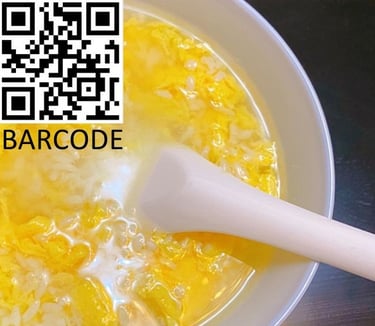

介绍制作蛋酒
米酒蛋用料
鸭蛋一个,糖一勺,淀粉 一勺,米酒半磅
米酒蛋做法
蛋打到碗里,用筷子搅散。
淀粉调芡备用。
锅里加一磅水,水开后入米酒;
水再烧开后,淋入蛋,
加入糖,淋入芡,边勾芡边搅,搅匀关火享用。
小技巧
如果有枸杞,可以放一些。控糖人士可以不用糖。米酒煮久了汤可能酸,所以别烧很久。
(感谢豆果介绍蛋酒做法和提供照片,若有侵权请告知。)
MINI MAPLE LEMON GLAZED HAM RECIPE FOR YOUR PICNIC.........
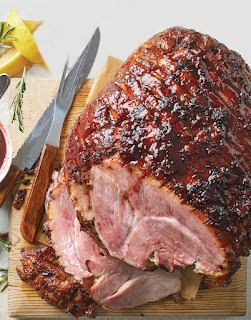

Maple syrup — it’s not just for breakfast anymore. The following Mini Maple-Lemon Glazed Ham recipe is good for lunch or picnic.
INGREDIENTS
1 cup maple syrup
Half cup lemon juice
1 Tablespoon Cooking Oil
1 Tablespoon thyme
Half package petite ham
Black pepper
INSTRUCTIONS
Preheat the oven to 425°. Coat a rack inside a shallow roasting pan with nonstick spray.
Combine maple syrup, lemon juice, and oil in a saucepan over medium-high heat; bring to a boil. Reduce heat to medium and simmer syrup mixture for 6 minutes; stir in thyme.
Reserve half the syrup mixture for basting and half for serving.
Arrange ham on a prepared rack; cover tightly with foil and cook for 20 minutes. Uncover ham and cook, basting every 9 minutes, a thermometer inserted in the ham registers 140°, 30 minutes more; cover loosely with foil if cooked quickly.
Transfer ham to a cutting board; tent with foil and let rest a few minutes before carving. Serve ham with the remaining half of the syrup mixture.
(I appreciate the CUISINE magazine for sharing the above recipe. Please let me know if it goes against the copyright.)
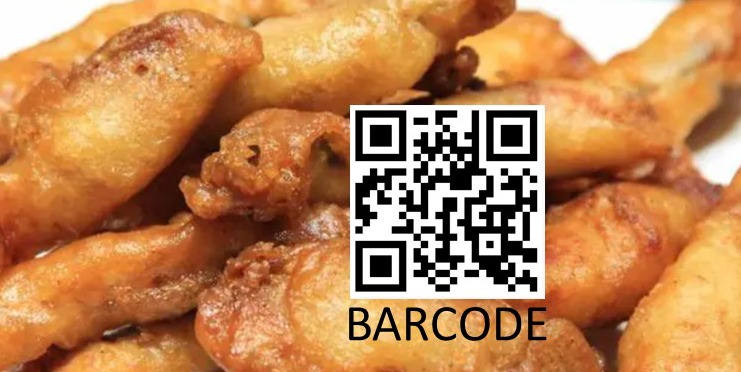

介绍油炸鳗鱼.........
油炸鳗鱼用料
鳗鱼肉 1 pound
糖 9 grams
炸粉 60 grams
素油 1 pound
酒糟 30 grams
生抽酱油 15 grams
油炸鳗鱼做法
切长6厘米、宽3厘米的矩形鳗鱼片。
鳗里加酒糟、生抽酱油和糖,密封后冷藏3小时,使鳗充分吸收酒风味。
在鳗鱼片上均匀裹覆炸粉以形成保护层。
在锅里倒入素油,加热后,放鱼片入锅,先单面煎炸定型,翻面后续炸,严格控制油温,别炸糊。福州菜重酱,可以搭配蒜酱作蘸料。
(感谢百度百科介绍油炸鳗鱼和提供图片,若有侵权请告知。)
PICKING 9 LAYER GLUTEN FREE VEGETABLE SALAD FOR HEALTH........
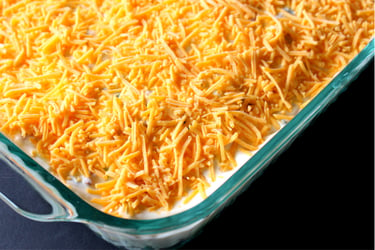

Ingredients
1 head of torn lettuce (or just one smaller bag of salad mix)
1 cup shredded cheddar cheese
1/3 cup diced pepper
1 cup chopped celery
1/3 cup diced onion
1 ripe diced avocado
1 cup pecans
1/3 cup chopped cabbage
1 pound cooked and crumbled steak
Dressing
1 Cup mayonnaise
1 Cup ranch salad dressing
1 Tablespoon granulated sugar
1 Tablespoon seasoning
1/3 Tablespoon garlic powder
Instructions
Layer lettuce, onion, pepper, celery, cabbage and crumbled loin steak into a large baking pan.
In a bowl, stir together mayonnaise, sugar, seasoning and garlic powder. Spread over the top of the salad after the loin steak layer.
Top with the shredded cheddar cheese.
Cover the container with plastic wrap and refrigerate for 9 hours.
Remove from the fridge. Add avocado and pecans (that way they stay crunchy).
This is best enjoyed on the first day or else it starts to go soggy.
Notes
Many of the listed ingredients can be changed or substituted to fit your tastes/preferences.
(It refers to the recipe from Chanda. Please let me know if it is against the copyright.)
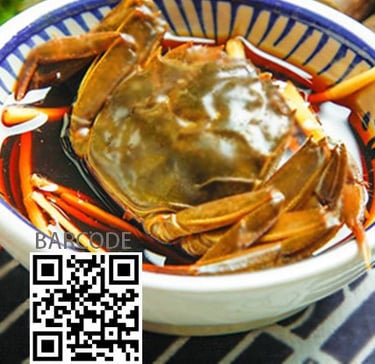

介绍醉蟹做法
生醉蟹用料
螃蟹 900克,糖 20克,李锦记味极鲜生抽酱油 60克,蒜 6瓣对切,小辣椒 1个切开 ,墨老酒 300克,烧酒,桂皮 1片,大料1个,柠檬醋30克,
生醉蟹做法
活毛蟹养一天以后,倒烧酒入螃蟹盆,没过蟹压半小时;如果没有足够烧酒,只能一只只轮番浸在烧酒里。
倒生抽酱油、糖、辣椒、蒜、桂皮和大料入锅,加盖大火烧热,微沸转小火几分左右。
关火待凉后加入墨老酒和柠檬醋,调成醉蟹卤。
备小瓦坛一只,逐只放入蟹,再倒入醉蟹卤,浸过蟹面为准。
封密坛口时加以摇动,使每只蟹匀浸着酒,约醉三天左右启封即可。
(感谢下厨房介绍醉蟹做法,若有侵权请告知。)
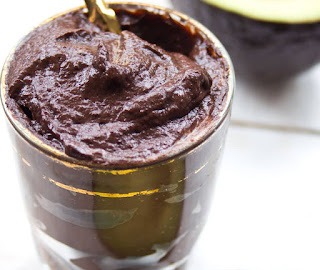

HEALTHY GLUTEN FREE AVOCADO MAPLE STUNNING MOUSSE DESSERT SNACK.........
Ingredients
1/3 Cup chocolate chips
3 Ripe avocados
1/3 Cup unsweetened cocoa powder
9 Tablespoons maple syrup
3 Tablespoons olive oil of choice
1 Teaspoon vanilla extract
Berries and pecan for garnish, if desired
Instructions
In a microwave safe bowl, melt the chocolate chips in the microwave (stirring in between).
Add avocados, cocoa powder, maple syrup, vanilla, olive oil and melted chocolate chips to the bowl of a food processor fitted with a blade. Process them to be very smooth.
Portion them into single cups, garnish with berries and pecan if desired. Refrigerate them so it will be ready to serve.
(It refers to the recipe from Juggling with Julia. Please let me know if it is against the copyright.)
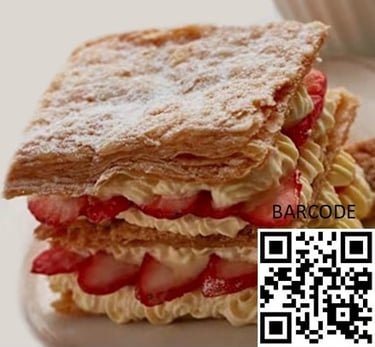

介绍拿破仑酥
拿破仑酥又称千层酥,酥皮之间的夹层丰富,不仅有奶油,还可加水果,如草莓、樱桃、红桑子、桃、蓝莓等,有些人选用巧克力或芝士等。以下介绍草莓拿破仑酥做法。
拿破仑酥材料
千层派皮,糖粉少许,奶油适量,草莓片适量,油适量
拿破仑酥做法
擀千层派皮,放入抹了油的烤盘;
将派皮表面用叉子戳出几个小细洞后,放入冰箱冷藏松弛约1小时;
再放入烤箱,以190℃烤半小时以后再翻面继续烤至酥脆;
取出放凉后,裁切9个片;
在6片千层派上先涂抹奶油,再放上草莓片。
以上材料相叠覆盖以后,再在这3个相叠材料最上面放派皮。撒上糖粉即可享用。
(感谢百度百科介绍拿破仑酥,若有侵权请告知。)
介绍做零失败桃子派.........HANDMADE PEACH DESSERT
把桃子切丁,放入糖。
锅里加些油,小火化掉后,把桃子丁放到锅里翻炒,可尝下味道,酌量再加糖。
已买来甜派皮,用叉子在派皮底部叉些小眼,防止烤制时鼓起,等15MIN,让派皮松一松。然后烤箱390F烤15分钟。
把已炒桃子丁倒入烤过的脆皮里,烤箱350F烤25MIN。
零失败野餐甜品完工。
若配上一杯茶或咖啡更好。
(感谢北美省钱快报提供,图源自shorturl.at/veEpc,若有侵权请告知。)

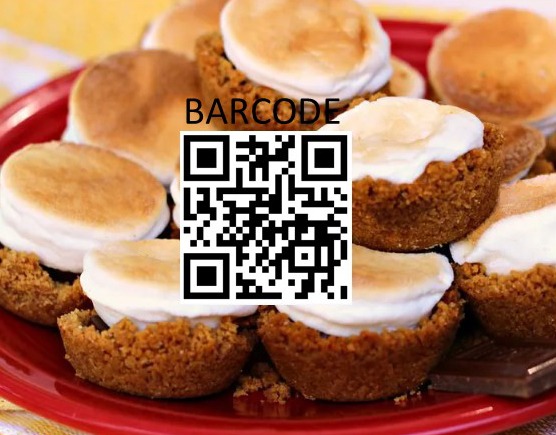

INTRODUCING S'MORES IN A CUP FOR DESSERT OR SNACK
介绍小杯子烤棉花糖
Ingredients
90 miniature marshmallows
3 chocolate candy bar, broken into 30 squares pieces
2 packages graham crackers, crushed
1/3 cup cooking oil
Directions
Preheat the oven to 350 degrees F. Put baking paper cups in the 30 miniature muffin tins.
Mix graham cracker crumbs with cooking oil in a bowl, evenly combined. Spoon graham cracker mixture into the prepared muffin cups, pressing into the bottom and up the sides to create a crust.
Place 1 chocolate square piece onto each crust and top each with 3 miniature marshmallows.
Bake in the preheated oven for about 6 minutes so marshmallows are puffy and chocolate is melted.
(I appreciate Katie for introducing S'mores in a Cup recipe. Please let me know if it is against the copyright.)
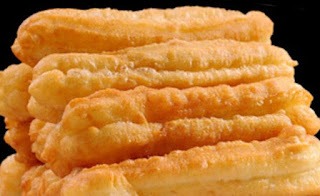

介绍油条来历和做法
油条又称油炸烩和油炸鬼。南宋时,民族英雄岳飞被卖国贼秦桧施手段陷害,南宋京城临安/杭州市百姓知道了这件事后,炸制了类似油条的面制品 - 油炸桧来传达愤怒。杭州人民在岳坟雕刻了秦桧铜人,面向岳飞墓跪拜忏悔。
(感谢央视网介绍油条来历,若有侵权请告知。)


介绍雀巢咖啡巧克力
(感谢雀巢公司提供上图,若有侵权请告知。)
雀巢集团公司源自19世纪,它的创始人是亨利 雀巢。1900年代,雀巢集团公司开始生产巧克力和速溶咖啡,雀巢咖啡是世界上第一款商业化速溶咖啡。
你可以用雀巢咖啡和雀巢巧克力制作一杯美味的咖啡巧克力饮品,请尝试以下一些方法,从简单速溶到独特创意特调都有哦!
速溶版
适合快速提神
材料
雀巢速溶咖啡一大勺
雀巢巧克力粉或可可粉一大勺
巧克力冰淇淋一大勺 (可选 )
热水300ml
糖
步骤
杯里加热水,加入速溶咖啡粉搅至融化。
加入巧克力粉,或掰一小块雀巢巧克力融化,搅至很顺滑。
加糖调整甜度,加入一勺巧克力冰淇淋,完成!
KitKat巧克力咖啡
适合爽脆甜品喜好者
材料
豆浆300ml
1条奇巧/KitKat巧克力
雀巢速溶咖啡1份
步骤
冲好一杯雀巢速溶咖啡,放凉以后备用。
压碎KitKat巧克力
在杯里倒入豆浆和咖啡,加入KitKat。
摩卡版
适合咖啡控
材料
雀巢咖啡适量
椰子汁300ml
黑巧克力一块或巧克力酱一大勺
可可粉
步骤
用咖啡机制作一杯浓缩咖啡。
隔水加热融化巧克力,或直接使用巧克力酱。
将巧克力倒入咖啡里搅均匀,再倒入热椰子汁。
撒入可可粉,享用一杯摩卡咖啡!
小贴士
冲雀巢咖啡巧克力时,植物饮料可以替换牛奶。
用纯水,适合喜好苦咖啡风味或控制热量的人群。
加冰块和冰淇淋,可做咖啡巧克力冰沙!
用黑巧克力或减糖可可粉更有益。
冰咖啡和巧克力糖浆,加入苏打汽水,做成气泡咖啡巧克力茶饮,很好喝!
(感谢DeepSeek提供,若有侵权请告知。)
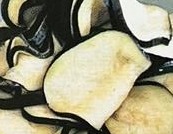

酒肴菜 – 芥末茄
芥末茄用料
茄子 3个
果醋 3大勺
芥末酱 3小勺
芥末茄做法
在大碗里倒入醋和芥末酱,搅均匀。
茄子切薄片,放入碗里搅匀浸渍。
喝酒时享用。
(感谢咕咕吃什么在下厨房介绍芥末茄菜谱和提供照片,若有侵权请告知。)


S'MORES CUP FOR YOUR DESSERT
杯装棉花糖
Ingredients
3 marshmallows
3 squares of chocolate
3 graham crackers
Preparation
Break graham crackers and chocolate into pieces. Put in a microwave-safe cup with marshmallows. Microwave for about half minutes. Let cool slightly before enjoying.
(I appreciate Emily Taylor for providing the recipe. Please let me know if it is against the copyright.)
(I appreciate DepositPhotos for providing the above picture. Please let me know if it is against the copyright.)
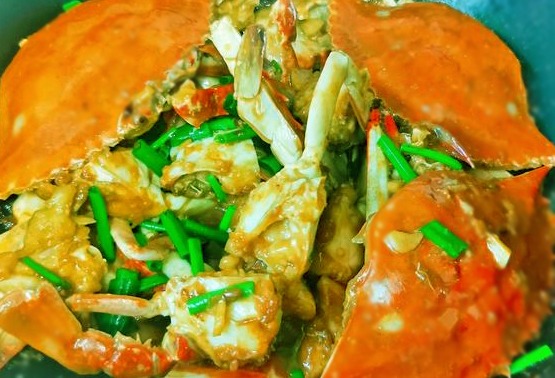

介绍蒜末三疣梭子蟹
三疣梭子蟹,因其甲壳有三个隆起疣得名,又称梭子蟹、枪蟹、海蟹、盖鱼、童蟹和飞蟹,属梭子蟹科梭子蟹属甲壳类动物。三疣梭子蟹捕猎凶猛霸道,一生有多次蜕壳。三疣梭子蟹个体大,富含Omega-3,营养价值丰富,且价格便宜。以下介绍蒜末三疣梭子蟹做法,梭子蟹有大小,请根据个人口味增减调味料。
蒜末蟹用料
梭子蟹 3只,糖 1大勺;葱 1小困,蒜 6瓣,淀粉 1大勺,生抽酱油 3大勺,豆瓣酱 1大勺,料酒 3大勺,植物油,醋 1大勺,蚝油 3大勺
蒜末蟹做法
梭子蟹掀壳,去掉不可吃部位,切块。蒜切末,葱切段备用。
糖、生抽酱油、料酒、醋、豆瓣酱和蚝油放碗里,搅匀调味汁。
蟹块沾上干淀粉。
油烧热,下梭子螃蟹微煎,再把剩余的蟹壳蟹脚放锅里一起煎半熟捞出。
在锅里倒入一些底油,入蒜和葱头爆香,放煎好的梭子蟹,倒入调味汁翻炒入味,再加入葱花,装盘即可享用。
(感谢Blanche在下厨房介绍蒜末三疣梭子蟹菜谱,若有侵权请告知。)
马铃薯炒鱿鱼
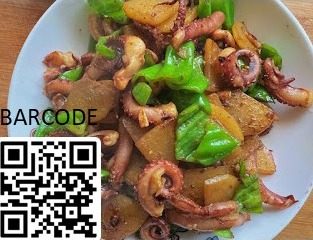

i2.chuimg.com/e1700eb8efd842feb106af93264a32dc_3414w_2560h.jpg?imageView2/2/w/660/interlace/1/q/90
用料
鱿鱼须 半斤
马铃薯 1个
孜然粉 3勺
生抽 3勺
辣椒 3个
姜 5片
蒜 5瓣
做法
鱿鱼须洗净,锅里放姜片大火烧开
马铃薯切片备用,稍微薄一点
辣椒和大蒜还有姜切好备用
鱿鱼须大火烧开之后,捞出备用
起锅烧油放入姜蒜爆香
先下入马铃薯片,翻炒至微黄
倒入鱿鱼须翻炒
酱料 - 生抽和孜然粉准备好
下入酱料,继续翻炒
最后一步,把辣椒倒进锅内翻炒均匀就可以出锅啦
辣椒不需要太熟,有点夹生,脆辣椒最好吃
(感谢下厨房网分享,若有侵权请告知。)
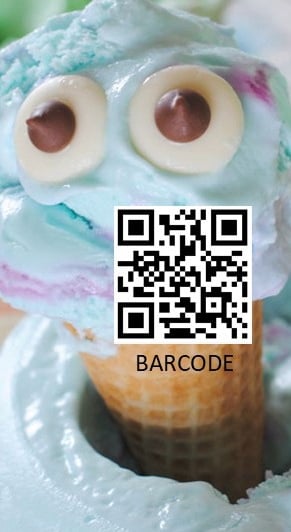

Monsters Ice Cream.........
Ingredients
Large White Chocolate Melting Chips, Regular Chocolate Chips, Ice Cream, Cones
Instructions
First, preheat the oven to 360 degrees.
Start by making chocolate monster eyes. Place the large white melting chips onto a baking pan lined with parchment paper. They don't need a lot of extra space. However, they do need a little bit of breathing room around each chip for melting purposes.
Set one regular chocolate chip on each of the white melting chips.
Place them in the preheated oven. Let the chocolates melt together for about 5 minutes. The chips will get a little bit gooey. Don't overcook the chocolate.
When the eyes are melty soft, take the pan out of the oven and put it into the refrigerator for about half of an hour. Once it is cool, the chocolate monster eyes will easily pop off of the parchment paper.
You could find some fun bright ice cream while shopping. There were several options to choose from in the monster colors.
Scoop the ice cream into a cone.
Add one or several chocolate monster eyes to the ice cream.
You could add the yummy monster eyes to any regular ice cream to make them Monster Ice Cream Cones. Let your kids help with the decorating to add to the fun!
(I appreciate Ms. Adelle Belnap for introducing the recipe of Monsters Ice Cream. Please let me know if it is against the copyright.)
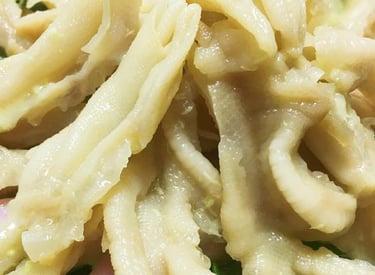

芥末鸭掌做法
芥末鸭掌原料
鸭掌一斤、醋半大勺、芥末油一大勺、蒜末一小勺、酱油一小勺、料酒一大勺、桂皮一片、大料一个、小辣椒三个、糖一小勺、味素半小勺。
芥末鸭掌做法
鸭掌洗净以后,放入锅里加大料、桂皮、料酒、小辣椒烧开,然后小火炖半小时左右;
捞出烧熟鸭掌放凉;
芥末油、糖、醋、蒜末和酱油倒入碗里调匀后,放入鸭掌搅匀后装盘即可享用。
小贴士
芥末油用量可根据用餐者的喜好来定。
(感谢下厨房介绍芥末鸭掌做法,若有侵权请告知。)
介绍三款荞麦面便当………
INTRODUCING THREE TYPES OF STUNNING DELICIOUS BUCKWHEAT NOODLE BENTO
瘦身一定得学荞麦面做法,以下介绍三款荞麦面便当。
油菜焖荞麦面
酱 - 生抽酱油1勺,老抽酱油1勺,李锦记蚝油1勺,豆瓣酱1勺
步骤
锅里倒入素油,炒肉片;倒入1勺料酒,加入干辣椒翻炒
放入酱,加入半碗清水煮沸,放入荞麦面煮熟,加入油菜烧开关火,盖上盖焖一下后装盒
芦笋拌荞麦面
酱 - 生抽酱油1勺,豆瓣酱半勺,李锦记耗油少许
步骤
荞麦面和芦笋煮熟备用
少油蒜末炒香放入肉丝;倒入1勺料酒,加入酱翻炒
倒入荞麦面和芦笋后拌匀装盒
三丝炒荞麦面
酱 - 老抽酱油1勺,生抽酱油1勺,李锦记蚝油少许,豆瓣酱少许
步骤
荞麦面煮熟备用
素油炒香蒜末,加入肉丝和1勺料酒炒,放入红甜椒丝略炒,放入韭菜丝炒熟
放入荞麦面和酱汁翻拌均匀后装盒
(感谢The Little Shop介绍荞麦面便当做法,若有侵权请告知。)

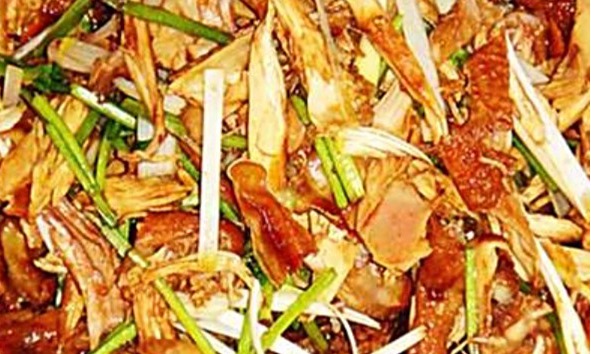

芥末鸡
芥末鸡营养价值丰富,潍坊的一道传统名菜,用鸡和芥末等调味品调制。
芥末鸡用料
熟鸡肉
调味粉
香油
醋
芥末粉
芥末鸡做法
熟鸡肉切长方条,整齐地放在盘里。
大葱切葱丝。
香菜切段备用。
放芥末粉在碗里,冲入沸水调糊状,用纸封严加盖,放几个小时,有香辣味后去盖和纸,放入调味粉、香油、醋,调匀芥末汁。
在鸡条上放葱丝和香菜段。
浇上芥末汁,吃时搅匀即可。
(感谢百度百科提供左图和菜谱,若有侵权请告知。)
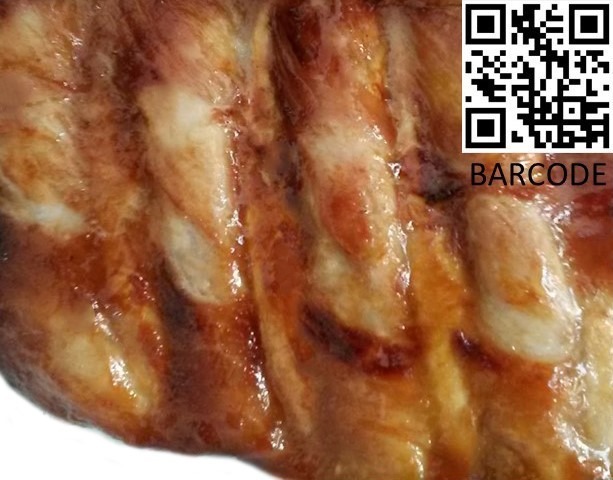

泰式芥末肋骨 THAI-STYLE MUSTARD RIBS
芥末肋骨用料
猪仔肋骨1条600公克左右,糖1小勺,柠檬汁或醋1大勺,蒜末 3大勺,芥末酱1大勺,胡椒粉1/3小勺,酱油1大勺,料酒1大勺,泰式鱼酱3大勺
芥末肋骨用料
所有调味料一起放入碗里搅匀,再抹在猪仔肋排上面和下面。
放在冷藏室里半天,使调料入味。
拨去肋骨表面调味料,放入烤箱以上火160℃、下火160℃烤半小时左右即可。
小贴士
请按个人喜好及烤箱脾气调整材料份量及烤制时间。
(感谢靓婆婆介绍芥末猪仔骨和提供照片,若有侵权请告知。)
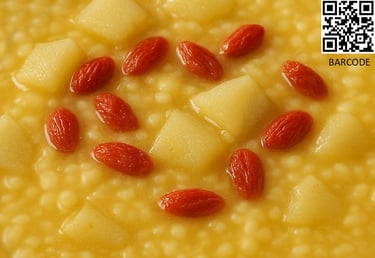
介绍枸杞鸭梨小米粥
INTRODUCING GOJI PEAR MILLET PORRIDGE
(感谢ChatGPT提供上图,若有侵权请告知。)
枸杞富含维生素、氨基酸、钙、磷和铁等微量元素,小米含有大量钙和铁等矿物质,鸭梨则富含柠檬酸、纤维和维生素,枸杞鸭梨小米粥营养价值丰富,可以养胃和安神明目、促进骨骼发育.
枸杞鸭梨小米粥用料
枸杞 1/3杯
小米 1杯
鸭梨 1个
枸杞鸭梨小米粥做法
小米和枸杞浸几分钟;鸭梨去皮切块。
小米和枸杞用大火烧开后转小火慢炖半小时,再加入梨块炖几分钟。
若喜甜,可加少量糖;若控糖,直接享用即可。
小贴士
如果小孩和老人享用枸杞鸭梨小米粥,建议炖粥至更软,以便消化吸收。
(感谢百度健康介绍枸杞鸭梨小米粥,若有侵权请告知。)


风味泰式火鸡.........
THAI LEMONGRASS TURKEY
泰式火鸡用料
火鸡块 3斤
胡椒粉 适量
柠檬草 3颗/拍碎以后切段
大蒜末 3 汤匙
生抽酱油 3 汤匙
柠檬汁 3 汤匙
豆浆 300 毫升
糖 1汤匙
泰式咖喱酱 1汤匙/可按辣度调整
泰式火鸡做法
火鸡表面抹生抽酱油和胡椒粉。
在碗里,倒入柠檬草、豆浆、泰式咖喱酱、大蒜末、生抽酱油、柠檬汁和糖,搅匀以后浇在火鸡上,盖好冷藏至少半天。
烤箱预热至 190°C。火鸡放入烤盘,酱料一起倒入。如果有配菜,可铺在底部。
覆上锡纸烤制 90 分钟左右。烤制时,每隔半小时,用烤盘里酱料浇淋火鸡一次。烤1小时以后,不覆锡纸烤到表面微脆即可出炉。
烤盘里的酱倒入小锅,用小火收浓,加少许柠檬汁和糖调味,即变泰式风味酱。
用泰式风味酱浇淋火鸡 → 风味泰式火鸡
(感谢ChatGPT介绍风味泰式火鸡和提供上图,若有侵权请告知。)

介绍水果火鸡.........
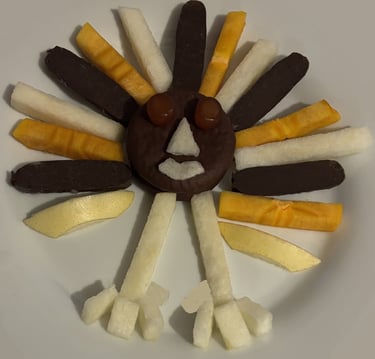
INTRODUCING FRUIT TURKEY FOR YOUR DESSERT
感恩节快要到了,没有烤火鸡,用水果火鸡可以代替。
水果火鸡用料
维生素软糖 2颗,柿 1个,鸭梨 1个,巧克力派 1片,巧克力 5条
水果火鸡做法
柿子和鸭梨切片狀。
放一个巧克力派在盘里,派旁摆设巧克力条、柿子和鸭梨片
剪一片三角形鸭梨片当鼻,半月形当嘴,长条形当脚,小长条形当作脚趾。
用维生素软糖当眼睛作装饰。
享用了。
小贴士
不同的水果有不同的造型,如挑选营养价值丰富李子和桃。
若不用维生素软糖,可使用你已有的糖果或水果,或去商店里买眼睛糖。
如果用90%黑巧克力,含糖量少一些。
(感谢洁娜丝介绍水果火鸡,若有侵权请告知。)
芥末鸭梨火鸡三文治
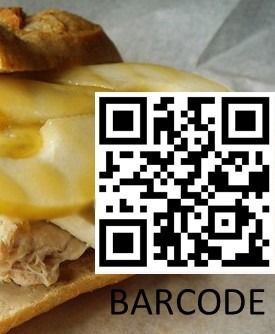

(感谢Flickr提供芥末梨火鸡三文治图,若有侵权请告知。)
鸭梨火鸡三文治用料
面包
鸭梨
火鸡片
大蒜芥末酱
生菜
鸭梨火鸡三文治做法
大蒜芥末酱涂在纵向切开的半片面包上
加生菜
放入火鸡片
铺上去皮无核鸭梨薄片
淋上大蒜芥末酱
盖上半片面包即可享用
(感谢开饭啦介绍芥末梨火鸡三文治,若有侵权请告知。)
介绍枫釉火鸡………Maple Glazed Turkey
INGREDIENTS
1 Turkey
3 cups chicken stock
1 Onion
Seasoning powder
1/3 cup maple syrup
3 Tablespoons cooking oil
INSTRUCTIONS
Preheat oven 190°C
Season turkey inside and out thoroughly with seasoning power
Place onion in the turkey
Brush one and half tablespoons of cooking oil over turkey
Pour half cup stock into the pan
Roast the turkey
Baste turkey with pan juices and add half cup stock to pan every half hour
Roast turkey for about 3 hours totally
Combine remaining cooking oil with maple syrup and brush over turkey the last half hour of cooking
(I appreciate Ashley for sharing the recipe of Maple Glazed Turkey on the MomsWhoThink website. Please let me know if it is against the copyright.)
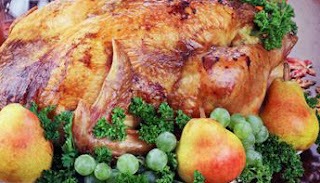

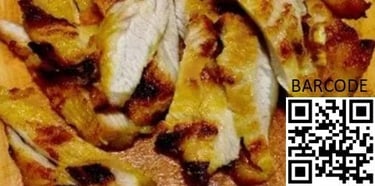

芥末火鸡做法
(感谢Cook1Cook提供以上图片,若有侵权请告知。)
芥末火鸡用料
9斤左右火鸡一只,糖浆3大勺,第戎芥末酱 9大勺,植物油3大勺,黑胡椒适量
蒜一个切末,盐3小勺,柠檬汁 3大勺
芥末火鸡做法
在碗里,放入芥末酱、糖浆、橄榄油、蒜末、黑胡椒、柠檬汁和盐,搅均匀酱料。
用厨房纸巾擦干火鸡表皮,涂抹酱料在火鸡表面,若能抹到皮下更好,盖上保鲜膜放入冰箱冷藏一天。
预热烤箱至190°C。
放火鸡入烤盘。
烤一小时左右以后翻转,再烤半小时左右取出,用酱料淋在表面防干,继续烤半小时。
出炉后,取出放置15分钟再切块,味道更佳。
(感谢ChatGPT介绍芥末火鸡做法,若有侵权请告知。)
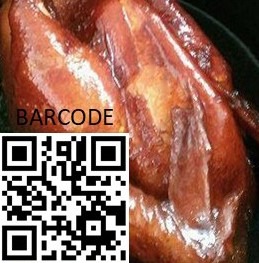

介绍电饭煲版酱油鸡
电饭煲版酱油鸡用料
鸡1只,糖1大勺,酱油1碗,蒜6瓣,料酒3大勺,油1碗,桂皮1条,调味料1大勺,油菜1小捆
电饭煲版酱油鸡做法
蒜切碎,放在酱油里。
用调味料抹一遍鸡内外,放置半个小时,用纸巾抹干鸡。
电饭锅放油,油热以后放鸡,盖上锅盖煎。
放入糖、桂皮、酱油和料酒烧。
每个5分钟左右翻一下,鸡烧好以后放油菜,烧熟以后关火。
(感谢记得笑在下厨房介绍电饭煲版酱油鸡和提供照片,若有侵权请告知。)

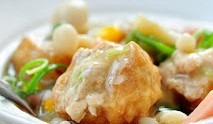
介绍油豆腐里脊肉糜
这道菜没什么难度,可味道却出奇鲜美,适合新厨师请客,不容易失败,可给你的厨艺加分。这道菜营养丰富清淡,油豆腐不仅不油腻,反有特殊香味,和油面筋塞肉大同小异,可以互换。
油豆腐里脊肉糜用料
里脊肉90克,油豆腐9个
油豆腐里脊肉糜辅料
海鲜菇一包,油菜几棵,玉米一大勺
油豆腐里脊肉糜调料
调味粉一大勺,肉汤一碗,胡椒粉一大勺,蒜三瓣切片,油一汤勺,淀粉一汤勺
油豆腐里脊肉糜做法
里脊肉剁碎,
加调味粉半大勺,肉汤一汤勺,胡椒粉半大勺搅上劲备用。
把搅好的里脊肉糜塞入油豆腐。
锅里放一汤勺油,炒蒜片。
倒入玉米、海鲜菇,炒均匀。兑入一碗肉汤,调味料半大勺,胡椒粉半大勺。
油豆腐放入,大火烧开,小火焖9分钟,入油菜。淀粉勾芡即可。请客时,可以摆好油豆腐,辅料浇在上面。
小技巧
因为选了瘦肉,所以加了素油和肉汤,吃起来更嫩滑。
(感谢美食天下老杨厨房分享,若有侵权请告知。)


INTRODUCING SAVORY MUSTARD SHREDDED CHICKEN NACHOS FOR YOUR SNACK
Ingredients
9 Cups Thick Tortilla Chips, 3 Cups Cashew Queso, 3 Tablespoons Mustard Sauce, 6 Cups Roasted Chicken, Paprika, Pepper, Sour Cream and Salsa. Sliced Pickled Jalapeños and Radishes are optional.
Instructions
Preheat your oven to broil.
In a bowl, shred the cooked chicken using forks, pulling the forks in opposite directions to break the chicken into small pieces. Add Mustard & Mayo Sauce, paprika and pepper to the chicken, mix them.
Put a sheet of foil or parchment paper on a baking pan. Place the thick tortilla chips on the pan.
Cover chips with shredded roasted chicken mixture.
Top with the cashew queso. Broil for about 9 minutes.
Add sliced pickled jalapeños, sliced pickled radishes, sour cream and salsa on the top. Enjoy!
(I appreciate Kate for introducing the mustard shredded chicken nachos and providing the picture. Please let me know if it is against copyright.)

介绍蛋酒咖啡 INTRODUCING EGGNOG COFFEE
Ingredients/蛋酒咖啡用料
One cup eggnog, Half tablespoon sugar, Half cup espresso coffee
一杯蛋酒,半勺糖,半杯浓咖啡
Instructions/蛋酒咖啡做法
Pour the eggnog into a large cup.
If you prefer it sweeter, stir the sugar into the coffee. Let cool slightly. Then pour into the eggnog, stir them.
Slowly heat it in a saucepan on low heat.
Pour into individual serving cups. You can also serve it at room temperature.
Optional - Sprinkle with cinnamon if you hope.
It is better to drink it with sweet dessert or snack. The sweetness of the dessert, combined with the smooth texture of the eggnog and the slight bitterness of the coffee. It is delicious。
蛋酒倒入一个大杯子。
如果喜好甜一些,可以搅糖到咖啡里。稍微冷却后,倒入蛋酒里,搅一下。
用小火缓慢加热。
然后倒入单独杯子里享用。你亦可以常温享用。
可选项 - 撒上肉桂粉加些风味。
和甜品一起享用更好。甜品和滑蛋酒加苦咖啡,很美味。
(感谢豆果介绍蛋酒咖啡做法,若有侵权请告知。)

